Salted Caramel anyone? Here’s an easy step by step

Perfect for sweet tooths and savoury lovers alike, it seems that salted caramel is STILL all the rage these days.

After making caramel the traditional French way for a while, I decided it was time to try the shortcut method.

So here’s a super duper easy salted dulce de leche step by step! It’s great for caramel slice, caramel tarts, caramel cake filling, a yummy spread on toast or just licking it straight off the beater!

You will need:

  • 2 cans condensed milk
  • A slow cooker or saucepan
  • Hot water just boiled in a kettle
  • Large pyrex jug or mixing bowl
  • Hand mixer with one beater inserted
  • Fleur de sel or rock salt (table salt will also do)

Method

10380769_723814264345742_5519349492897624236_n

1. Place two cans of condensed milk in a slow cooker
2. Cover the cans with at least 1-2 inches of hot water. on high setting. Simmer for 2-2.5hrs. The beauty of a slow cooker means you can set it and still go out, run errands and come home to a job done without a risk of a fire in the house! Note: the can labels will come away after a minute or two – just use some tongs to fish them out. I used Carnation brand skim condensed milk for a healthier option but full fat tastes even better.
3. Watch out for explosions when opening the cans! Ring pull cans are much easier to open. Use a tea towel or oven mitt to protect your hands as the can will be hot!
4. Put the caramel in a mixing bowl or Pyrex jug. (Skim condensed milk will look more lumpy as it has more gelatine content – don’t worry, it comes back together)
5. Add 1-2tbsp of good quality salt or to taste (I used rock salt)
6-8. Use a single beater hand mixer and beat til the caramel looks glossy. Best to mix the salt in when caramel is warm to dissolve the salt.
9. Serve! (I tried this with green tea cake and it was delicious!)

Credit: Recipe Adapted from Sharon Wee Creations fab new book Adorable Cakes for All Occasions!

Behind the Scenes of an epic suspended birdcage smash cake

Last week I unveiled one of my most challenging creations to date at my very own 30th birthday party which was the culmination of month-long collaboration between Anna Maria Roche of Anna Maria Cake Design, myself and my dad (yep that’s right, my DAD!)

The Concept

A lot of people have asked me how I got the idea and the first inspiration actually came from the venue itself which had some really old vintage birdcages hanging from the tree. I’d always wanted to do a suspended birdcage cake but then I let my imagination run a bit wild as I thought a birdcage on its own was simply too boring and that it should incorporate techniques that I had not used much before – if nothing else but to hone some new skills.

The first thing was to do away with the traditional bell shaped birdcage I have seen so many times before and instead I though a square-ish atrium would be cool. I then added another concept which was of a “piñata” tier – I had seen a few piñata cakes online but none were executed very well and I wanted to be able to shatter the top of the bird cage with a hammer then have berries or candy flowing out for a bit of an unexpected twist to indulge the big kid in me! There were also going to be lots of kids at the party and I thought how cool it would be for them to see a ton of candy flow out of a giant cake.

A myriad of ideas cycled through my mind as to how to achieve this… and so many ideas wouldn’t work!

Idea #1: Chocolate?  Problem: Wouldn’t shatter enough and would look too different to the rest of the cake which would be covered in fondant.

Idea #2: Fondant? Problem: Wouldn’t dry hard enough to achieve a ‘shatter effect’

Idea #3: Sugar? Problem: Too transparent and again would not look consistent with the rest of the atrium plus humidity would kill it instantly!

Anna Maria and I debated for a while what to do and I finally had a brainwave and came up with pastillage!! If you have no idea what that is, it’s a fancy french name for a magical, super fast drying, extremely brittle, porcelain-like sugar when rolled thinly and looked identical to fondant.

For it to work we needed to make a former so I carved a styro tier with Anna Maria’s help to create a shape to mould dome and we tested multiple recipes to see what would shatter best. I even tried gumpaste and it was not cooperating with the humidity we had. We finally managed to figure out that Anna Maria’s pastillage recipe (adapted from famed pastry artist Ewald Notter) would work and we left the dome shape to dry overnight. For a copy of Anna Maria’s super fast drying awesome pastillage recipe, scroll to the bottom of this post!

image_1

I hate styro carving!

Details, Details..

The last couple of ideas I incorporated in were some Cake Lace and royal icing bead piped trims. For more information on Cake Lace and how to use it, click here. I had originally wanted some birds in there but the complexity of getting every single line perfectly straight and the smash tier working took a huge amount of time.

image 4

No room for any organic finishes here!

The Process

I had no idea how this was going to turn out but I figured if anyone could help me execute it, it would be my dad and the super fast, super talented cake decorating expert Anna Maria Roche.  Anna Maria and I worked like maniacs for 2 days stopping only for some awesome home made soup and prawn dumplings. I cannot thank Anna Maria enough for her generous guidance and support and working alongside a true industry pro really lifted my own working habits, speed and technique. I think I will always feel like a snail next to her but it was still an awesome experience to be mentored by someone who oozes speed from every pore.

 image   image_3 

Anna Maria and I testing Dad’s structure with the full weight equivalent of the real cake (21kg of icing!) for the first time

 image

The painstaking process of 1.5hrs of applying extruded lines onto the cake after marking every line with a pin and careful mathematical measurement.. 

The Structure

Building the supporting structure for the cake was probably the most challenging part as there was quite a bit of physics and research involved. Suspending a cake that could potentially more than 20kg in mid-air, withstand a pretty hard hammer smash and stay up for 4-5 hours would require some serious hardware.

For the solution, I turned to my extremely handy father who not only had access to a proper metal workshop but also (conveniently) knew how to weld and had the tools to bend, drill and cut very long and large steel rods.

The stand itself was inspired by a tree shaped stand I’d found online and this was probably the most difficult part of the process. After dad constructed the stand, the finishing of the joints needed some refinement and luckily I found some very handy “Knead-It” which was like a polymer clay that is pliable but sets hard like concrete within 2 minutes and you can even sand/drill it. After priming and painting it, my beautiful new white faux-tree cake stand structure was ready for final testing!

image image_4

SuperDad bending steel rods to form the 1.8m tall stand and the final product of putty, primer and white epoxy paint by yours truly!

image_2   image (2)

Hard at work

The Final Test

Doing the final weight test on the stand was left to the last minute..up until this point the stand had only been tested for around 30-45min to withstand more than 20kg of weight and I wanted to make sure it would last for the duration of the whole party (4-5 hours). I was fresh out of icing buckets that were full so my trusty brother loaded it up with my golf set, a backpack stuffed with heavy books and yep in true Chinese family style, a huge sack of rice!

image_1 (2)

30kg of golf equipment, backpack and a sack of rice loaded on the stand held up by one tiny chain!

The Result

So here is the final result after I managed to get it home in one piece…we’re both looking a little worse for wear but the result was totally worth it!

image_2

For more photos of the cake, click here

The Smash!

Here’s a paparazzi style video of the big smash and I still had my doubts right up until the last moment whether it would work.. Thanks to Elliott for this video (and apologies for my mum-in-law and the giant helium balloon joining the frame but you get the idea!)

10372332_710952152298620_7118351832502999791_n

With thanks..

I learned a lot pushing myself beyond what I thought I could achieve and setting a new personal best for my cake projects. I also learned the importance of counting on some true experts and developed a even higher level of respect for my Dad who worked his tail off to make my stand in just a couple of days.. you’re the best Dad!!! I can’t forget my ultimate support team – especially mum who does what she does best: keeping dad on track, my bro for helping me to transport it and my husband Paul for being a great sounding board! Anna Maria’s husband Joseph was also an invaluable source of help with his pastry chef background and feeding us whenever we got hungry – you’re a legend Joseph!

Last but not least to my awesome mentor and partner in crime on this project, Anna Maria – industry pro, legend and super generous all round cake deity. I hope I become half as fast and almost as good as you one day many moons from now! We had so much fun working together, listening to bad radio and eating random green tea treats. Thank you for putting up with my mess and the mayhem we created!

Thanks for reading and if you liked this project, please help me out by voting for it here in The Raspberry Butterfly’s 2014 best cake photo competition!

Amy x

Anna Maria Cake Design’s Pastillage Recipe to make smashable tiers! (Adapted from Ewald Notter)

8g powdered gelatine

50g water

430g icing sugar

75g cornflour

1. Sprinkle gelatine into cold water in a microwave safe bowl. Leave aside for 5min.

2. In another bowl sift icing sugar and cornflour

3. Melt the soaked gelatine in the microwave

4. Add the melted gelatine to the icing sugar and cornflour, mix the dough until well incorporated

5. Scrape contents onto a clean work surface and compress/knead with clean handsuntil a smooth consistency is achieved (Note from Amy: warm hands and muscle power work well here!) If the mixture is too dry, add a few drops of water. If too wet, use extra icing sugar (a little at a time)

6. Once a smooth ball consistency is achieved, the pastillage can be used immediately – alternatively smooth a thin coat of crisco or shortening all over it and double wrap with plastic wrap and store in a ziplock bag to avoid drying out. The dough can be stored for a few months but it’s best to use fresh.

My Tips for Using Pastillage

  • Pastillage does dry quickly but there is no need to panic – have templates of what you are making cut out beforehand so you don’t have to invent on the fly.
  • Allow 48hrs for the pastillage to dry completely – depending on the humidity of the drying area, 24hrs may be sufficient. It should become whiter as it dries and look like porcelain.
  • Use silica gel packets to help absorb moisture and speed up the drying process – in extreme cases, a dehumidifier or the airconditioner also works
  • Wooden boards are ideal for drying flat panels (not metal sheet pans) if you are making a box or other shapes that require a smooth finish.
  • Try to use pizza cutters or very sharp palette or craft knives for cutting – blunt knives will cause the dough to move out of shape when cutting which can make it hard to seal. A thin coat of crisco on the cutting instrument will also help with cutting smoother edges.

Why not quit your day job?

If I had a dollar for the number of times I’ve been asked this question in the last few months I’d be a very wealthy lady. It’s a question that often comes from friends, friends of friends, people who have just met me, colleagues and family members. I realise that that list is includes virtually every person in my life. Notice however that I have left ‘other decorators’ off that list!

In fact, those who do not live cakes every day (or have a side venture that is purely about their passion) are often surprised I have a day job AND a passion that funds itself…Conversely, I actually get asked a slightly different question from decorators who seek my advice on whether they should leave their day jobs.

Perhaps why I get asked this is because I take my passion very seriously and I also have a pretty serious “day job”. Over the space of just a few years, I have also invested a huge amount of time and effort getting myself qualified, trained and practising my skills in sugar art every day. Yes it is an obsession and I’m frequently unapologetic about that because passion is not something you can contain and I firmly believe you shouldn’t have to!

So let me explain now why I still keep my day job and by the same token, these same reasons also hold a lot of decorators back from going full tilt at their own business.

1. The first reason is I actually LIKE my day job. Most decorators who have successfully gone solo are ones that didn’t need a reason to quit their day jobs but cakes helped propel them down a path they were already travelling. I don’t see my day job as a day job…. and I actually don’t like using that term – “day job”. It makes it sound like I dislike it when in fact I actually quite enjoy what I do and love the intellectual challenge of solving complex business problems every day and helping clients to make big projects happen. I think my brain would turn to mush if I just looked at cakes every day – much as that is tempting proposition in itself!

I returned to my job after my sabbatical in New York last year because I realised I had unfinished business – goals I still wanted to achieve in my professional career that I wasn’t satisfied in just walking away from. I really wanted to get to a stage where I could be happy to walk away because I’d pushed my development to a level where I had learned as much as I could in the areas I was most passionate about. Only then would I be happy to walk away. There is still a lot left to learn in what I do but mind you, I will caveat all of this by saying that I do wonder what more I could be creating if I wasn’t at my desk everyday!

2. The second reason is I’m deathly afraid of killing my passion to maintain my lifestyle. Cakes are all about creative freedom for me. A lot of people think it would be really cool to live your passion every day and be doing what you love every minute of every day  – the truth and reality of it is that I have done enough production, slaved enough hours in my kitchen and interned enough to know that passion compensates for a lot of gruelling hours, but it isn’t always enough. Cake decorators live very simple lives and only the very elite get to travel the world and make huge livings from teaching. High end custom cakes are lucrative if you’re smart about how you price and have razor sharp focus on who you market to however the “real” money is in high production volume.. i.e. Doing a lot of cakes.

Taking on work to bring the dollars in can often mean doing cakes that don’t push your development further.  The more you produce to make an income, the more likely you are to take on orders that you know won’t add anything to your portfolio but that you also can’t say no because you need the  cash. In creative fields, it’s the  really really cool clients that commission you with few boundaries and true creative freedom that make life in your chosen art worthwhile and rewarding.  I know many many decorators who take on projects that don’t extend their skills or push them beyond their current ability purely to bring the dollars in. Keeping my job means I don’t worry about this because I can be highly selective in what I choose to do and only take on very few orders so I can give each one enough attention to keep the quality of my work very high. It also means I don’t have to sacrifice what I enjoy doing in life because of limited income. On another note of slightly twisted logic, I like to think of my steady income as supporting my unsteady income – having more money at my disposal means I can funnel more back into my passion!!

3. Lastly… I’m still forming a sustainable niche for myself. I don’t think I’ve figured out my niche quite yet in this market – the hallmark of distinction that I’ll create a legacy for and makes me stand out from the crowd. There are so many avenues I haven’t yet explored and so many areas I see opportunity  in that I’m happy just to explore at the moment. My natural initial reaction is to pursue them all at once, but I tried this for a few months last year and truth be told, it was really bloody hard! Living the “carpe diem” life is really really tiring. Now I’ve realised I just need to bite off opportunities in small chunks.

At the moment, it’s all about exploring teaching for me – and how good at it I might be. But I also think to myself: “I love teaching right now, but is it something that will keep me going for the rest of my life?” I don’t know yet. “How can I teach others if I don’t keep developing my skills?” Staying on trend and relevant is crucial in this industry so production work is pretty important too.  Production work is exhausting but SO satisfying because you create something new every time and doing big bold cakes with a team is an irreplaceable experience. It’s actually pretty similar to what I do in the corporate world – big hairy projects that seem unsurmountable at first but as you get through each stage, you see things come to life and eventually it starts to take a life of its own and you finally let it go free into the world!

So I guess what I’m trying to say is that quitting my day job isn’t the right answer for me right now… But if you’re a decorator or sole trader out there who is still living your life in two worlds every day, you’re not alone! And thinking about which of the three factors above resonate most with you and your life situation now is a very individual decision – and it’s not one to be taken lightly, especially if you have kids and a family to support.

Some final thoughts…

I follow Flying Solo avidly – it’s an Australian community site for micro business which gives small business owners handy tools and an opportunity to collaborate and swap learnings.  I just love the encouraging words from their facebook page that pop up on my feed every day. One particular post that was really thought provoking was: “What would you do in your business if you had no fear of failure?”. The most interesting response was “quit my day job” and the second most interesting one was “Start it”.

To all the decorators out there still finding their feet: you need to decide for yourself what is driving your fear of failure. Then break it down in small chunks to eventually overcome that fear. Often those failures are direct link to your personal values.  And there is absolutely nothing wrong with that! If the first chunk is to free up your time without sacrificing your lifestyle or creative freedom then sure, go for it! But what will YOUR sustainable niche be in the market? Challenge yourself to specialise one day…. what will make you unique in 10 years time? This is the part which I don’t believe enough people spend time on defining and refining.. It’s too easy to caught up in just jumping straight in and not take a step back to ask yourself what you want your legacy to stand for.

Anyway, enough waxing lyrical from me… Hopefully I’ve put to bed the question I am most frequently asked by now and also helped some of you out there in some way.

In the spirit of exploring my own current “chunk” of teaching – my next post will be an illustrated tutorial.

On a totally separate note: I’ve also managed to somehow convince nearly 1000 others to join me on this crazy journey of mine on Facebook so I’m celebrating with a $150 voucher giveaway!! To enter simply leave a comment on this post or “share” this FREE CAKE picture on Facebook.

Picture from Regular Show characters. Source: DeviantArt

Picture from Regular Show characters. Source: DeviantArt

Adios for now and thanks for reading,

Amy x

Terms and Conditions:

The voucher is redeemable towards any custom cake of your choosing or private cake tuition!! The winner will picked at random and will be announced at 6pm AEST on 6 April. All entries must be on the share list or on the comments list on this post by 5pm 6 April to be eligible. Terms and conditions apply, subject to availability. Voucher is transferable and cake must be picked up from the Sydney CBD area!

Innovation in the cake industry for the uninitiated – and why it’s important

It’s been a while since my last post and that’s been for a good reason – I’ve been busy learning and developing my skills. Practice, practice and more practice makes, well… better – not perfect. Perfection is probably a little unhealthy to strive for but “becoming better” is always a tangible, achievable goal.

I decided in this month’s post that I would put on my entrepreneurial management consulting-y hat and focus a blog post on innovation and its importance – even in an industry as age-old and perceived to be “old fashioned” as sugarcraft.

I received one of the coolest gifts ever for my last birthday from my best friends – an antique first edition of the Lambeth Method of Cake Decoration and Practical Pastries by Joseph Lambeth. A remarkable book first published in 1936, it holds a court as the grand dame of my bookshelf, perched proudly above more modern publications on the myriad of techniques that make up this world known as sugarcraft. The techniques it covers are nearly 3 times my age and reminds me of just how long the art of cake decoration has been around and even more importantly, the innovations that have happened in the decades that have followed.

lambeth

Once the realm of grandmothers and elderly ladies who have concentrated on classical techniques, pillared cakes, elaborate piping and antique looking sugar flowers, there have been a myriad of changes since The Lambeth Method  was published.

Cakes have evolved from old fashioned elaborate and intricately piped creations…..

lambeth2


…. to thoroughly modern styles that still pay homage to age old techniques…

adriankaman1

These days, cake decorators are now wearing multiple hats as handy(wo)men, engineers, architects and sculptors. The use of construction tools are a huge area of innovation in the craft.

In fact, I don’t think I’ve ever had this much in common with my super handy dad in my entire life. Nowadays, you’re more likely to find me in the garage drilling cake boards with him and raiding his tool boxes for any handy artefacts that I might find useful in my own cake studio from scrapers to metal rulers to sandpaper and saws. I have a newfound admiration for the incredible handyman skills dad has – everything from learning which drillbit to use that damages paper covered MDF board the least to which glues to use to best adhere styrofoam together, there is definitely a gap in the market for a cake decorator’s handyman short course! In fact, never felt more comfortable in Bunnings (a hardware store in Oz) in all my life!

On my free weekends, I’m usually stalking the aisles of Kmart for butane gas canisters to refill my blowtorch, discount stores for non-slip mats to secure cakes for transport and haberdashery stores for bedding inlay to dry sugar flowers or outdoor camping stores for fishing tackle boxes to store my cake tools… One day, I will publish a glossary for why I buy such things for the unitiated – but for those of you who make cakes for a living or do it as a serious hobby, I’m sure these tales are not foreign to your own experiences.

Kaysie Lackey, an exceptionally talented cake artist from Seattle Washington came to Sydney recently and reminded me again of just how zany handyman skills can become in the world of cake construction. Everything from foam core board, pine wood and plates to plumbing pvc, washers, nuts, bolts and screws were used in construction one of the most insane cakes I’ve seen. It woke me up to just how far cakes have come and how extreme techniques are becoming to create the most amazing gravity-defying constructions.

IMG_0765

I also recently did some incredible freelance work with the legendary Anthea Leonard of Sydney’s original sculpted cake studio, Sweet Art, and on my first day I was asked to use a jigsaw to hack off the legs of a dozen Barbie dolls…. We were making a 175th anniversary cake for a huge gala celebration for the Australian Gas Company and this cake was a monster. The Barbies were to represent the AGL ballerinas used in the ads during the 70s and sawing barbie legs off was closely followed by intense mathematical calculations with another Aussie cake industry legend Jean Michel Raynaud to work out how many miniature model street lamps we could wire into a cake board to light up electronically so the bottom tier of the cake could resemble a proper street sidewalk. This cake was so OTT it had everything – and I mean everything. At nearly 2m tall, each tier represented a different stage of the famous Australian Gas company’s rich history. More importantly, it represented an amazing opportunity to work with some of the industry’s most gifted artists.

sweet art

I’m proud to say that the Australian sugarcraft industry for cake artists has been a hot bed of innovation and talent for some time. Taking the originally French method of using ganache to fill and cover cakes to create clean a highly stable base for contemporary “sharp edge” cake designs, a number of talented people in the industry here have taken innovation to a whole new level.

Then you have the Americans who are just magnificent in cake construction using carpentryand plumbing equipment to create super stable cake stands for all sorts of interesting and gravity-defying shapes. Take Mike’s Amazing Cakes for example – Mike McCarey is famous in the cake world for making seemingly gravity defying cakes which take novelty work to a whole new level – case in point – this beautiful stag that was created by my friend and amazing decorator Sharon Wee under the tutelage of Mike McCarey himself:

SharonWeestag

Picture used with permission from Sharon Wee Creations (www.weelovebaking.com).

Why innovate?

Like in every other industry I see as a management consultant, innovation is the only way we can move forward and break new ground to make processes and outcomes more efficient, more consistent and more repeatable. As the saying goes, it’s usually borne of necessity however those that take the step forward and put something different and new out there are the ones who move the remainder of the pack forward as a whole. To compete, you can either be a cost leader (ie, discount to make a sale) or differentiate to create competitive advantage – in my mind, innovation is the best way to differentiate.

It also builds respect in an intensely competitive industry where you can not only help yourself but help others to progress their skills and build the reputation of the whole industry. Gone are the days of cake decorators being old nanas in the kitchen (although these ladies were innovators in their own time mind you and deserve a LOT of respect!) – it’s time say welcome to a whole new generation of cake innovators and cake decorators – the ones who will move the craft forward and propel it into a deeply respected and revered art form that very few can master and many will attempt to master!

It’s been a slightly more philosophical post this time – next time I’ll cover more of my usual stuff on cakes. Wedding cake season is coming up again and I hope I can also bring you an exciting international blog post too as I revisit my alma mater in New York and catch up with some old cake buddies there!

Giveaway .. Masterchef Live tickets for this Friday

Since I’ve returned from New York, I’ve been approached by many people near and far about classes .. which I would love to do next year except I’m not sure what you want to learn! So here’s a little sweetener..

I have 2 all day Masterchef Live in Sydney general entry tickets to give away for this Friday 5 October at the Hordern Pavilion.

For a chance to win, like this post or leave a comment on what cake or pastry related techniques you’d most like to learn! They can be anything from macaron towers to fondant basics so toss some ideas at me and I’ll see who I can team up with to make them happen!

Comment on this post or at http://facebook.com/amyscakes1 to enter!

More posts to come (I just need to be less busy first…)

xx

Note: Winner will be picked completely at random and tickets posted to you.

When Bloggers meet..

It’s only recently struck me just how powerful building an online following is in the cake world. It’s astonishing how some of the most talented people I have seen are practically celebrities in their own right purely through their enormous facebook followings when in any other era, they would simply be craftspeople with enormous talent and a local following in their immediate geographic vicinity. Blogs are a great example of this and I’ve met two of my favourite bloggers recently who I want to shine a spotlight on this post.

The first is Mandy Mele-Daniels: best known for her blog on her own French Culinary Institute adventure which was re-posted by Ron Ben-Israel when the cake course he developed was first launched. At one stage I think Mandy had thousands of readers just through Chef Ron’s plug alone. After several failed attempts to catch up thwarted by weather and bad NY public transport, we finally met up in my last week in New York at the iconic Plaza Hotel. In true sweet tooth form we sampled nearly every cake on offer at the beautiful food hall under the famous hotel and chewed the fat (translation for non-Aussies: had a good chat) over our experiences at the French Culinary Institute and about the cake industry in general. Mandy was responsible for enlightening me about my FCI adventure and giving me some fantastic advice that ultimately culminated in my trip to New York so to finally meet her was just brilliant.

I also had the pleasure of meeting Mandy’s husband Brian who was just a great, great guy. Listening to Mandy and Brian reminisce about their caking stories when Mandy first started making cakes, I realised just how similar our paths had been. In many ways Brian also reminded me of the great unsung heroes in the cake world – a.k.a. the thousands of tolerant husbands/partners out there supporting their wives/other halves each pursuing their own caking adventures!! So this post is partly also a tribute to all of these nameless, faceless other halves who don’t get any credit for the beautiful cakes we make every day.

So here’s my THANK YOU to all the supportive husbands/partners out there (including mine!) for all the times they:

– put up with getting shooed out of the kitchen at 1am in the morning when they worriedly check on their cake-obsessed wives frantically finishing an order for the next day;

– suffer minor heart attacks whenever they have to drive a cake to its destination;

– attempt to roll fondant out only to be told they are hopeless when they were just trying to help;

– are forced to ganache cupcakes or be guinea pigs for new classes their wives are about to teach (usually against their will because all they care about is eating the cake, not decorating it)

My awesome Mr Cakespeare

The other famous blogger I met was Sharon Wee. After returning home from New York, I decided I needed some inspiration and decided to meet with as many cake industry greats as I could and Sharon was one of the first.

Sharon’s an incredible Australian talent who has over 7,000 followers on facebook and  I have been reading her blog “Wee Love Baking” for some time. Sharon was fantastically humble, open and generous in her knowledge and time.

When we met for what was supposed to be an hour long coffee, we both realised nearly FOUR hours later that we’d been neglecting our partners for a very big chunk of a Sunday afternoon just to indulge in “cakie chat”… After trading a multitude of cake stories we guiltily hurried home and back to the real world….  I felt almost lighter after this conversation – enlightened with new knowledge but also very inspired and motivated to keep pursuing my passion. It was just a great shot in the arm after trying to transition back into the “real world” from a surreal 3 months away.

It’s through these types of conversations that I grow as a cake artist and also expand my knowledge of the industry. What I’m fast learning is that the cake world is vast, complex and very much a dynamic industry. It is not perfect by any stretch but with the right level of dedication, motivation and creativity, it can be an intensely rewarding one. It’s not without its drawbacks or politics (just like any other industry) and I am quickly learning that the only way to really navigate tricky waters is to stay out of them completely.

The funniest thing is, practically no cake artist starts out seeking fame – all we want to do is create cakes and make a positive impact on people’s lives through edible art. I’m very fortunate to be in a position where I can be selective in what I choose to do and focus on improving my skills purely for artistry’s sake and not have to make cakes just to pay the mortgage. It’s for this reason I continue to work as a management consultant and most of all, I enjoy being able to balance exercising my right and left side of my brain every day. I don’t think many people could say that and I feel very fortunate that I have a world of opportunity beckoning before me right now. That’s not to say that one day I won’t pursue things much more seriously but for now, I’ve realised that getting exposure and experience is the most important thing to me and I plan on giving my all to anything and every opportunity that comes my way. Then hopefully one day I’ll reach a completely different summit in my life.

In the mean time, I’ll continue to blog about my adventures. Coming up in the next couple of months.. an inverted wine bottle cake, a couple of very cool wedding cakes and some giant sugar flowers! Can’t wait to share it with you all 🙂

Cakespeare in the City: Episode 5 – Finals Fever and Graduation

I went back and read my very first blog entry that my friend Daniella encouraged me to write and still can’t quite believe how far I’ve come in such a short time. I don’t check the stats too often so I got a slight shock when I looked at them yesterday. This blog and my facebook page has had over 8,000 views in nearly 20 countries and I figure since I don’t have that many family members, a large percentage of these are people I have probably never met before! What staggers me more is that I never thought anyone would actually be interested in my little musings which I wrote more for myself than anyone else to capture my experiences for posterity.

So 1 year on, what have I managed to learn?

  1. I’ve learned that even you think you cannot be “artistic” it’s still possible to make beautiful things with a little courage.
  2. I’ve learned that you can start with a simple monkey figurine on a 6 inch cake and work your way up to a 4 tier monster of a final wedding cake at the best culinary school in New York –  all it takes is a high level of dedication and patience (and a supportive husband!)!
  3. I’ve learned that if you sleep less you can complete more than 35 cake projects and still hold down a full time job (albeit quite a few of these were done in culinary school where I have had the privilege of uninterrupted practice and focus)
  4. I’ve learned that inspiring others through a humble craft can be mind-bogglingly powerful.
  5. Finally, I’ve learned that I have so much more to learn!

It hasn’t all been peachy… There have been some downsides too. I’ve picked up a very sore right thumb and probably the beginnings of carpal tunnel in my right wrist which will only probably get worse! Endless hours kneading fondant or gumpaste will do that to you.

Silver lining? My once weak arms are actually kinda muscly now! And sore hands means more massages!

The final weeks..

The lead up to Finals Week at culinary school were very much focused on advanced decorating techniques and tons of projects. We covered nearly every technique under the sun but although I was learning so much I still felt like I could do with another 3 months here.

So project-wise, here are a few of my favourites…

A Circus Topsy Turvy Cake which took 2 days to create. The poles were airbrushed red after taping and the elephant was made out of rice krispie treats! each stripe and semi-circle was painstakingly measured and cut to size and individually pasted on.

A very cute Russian Doll carved cake which I modified into a China Doll by adding on a head made of rice krispie treats (so it didn’t collapse) with cute knots for hair and a hand painted face. This cake was made from lemon ginger pound cake and buttercream and took around 6 hours  to create.

My absolute favourite has to be this carved Kate Spade handbag which was by far the most challenging.

The hardware was made from gumpaste and wired for support. Whilst the shape was relatively simple, I couldn’t believe I managed to pull the painting of the pretty intense design off.  

One of the biggest projects of the course was a wedding dress cake which brought a whole new set of challenges where I had to make a flower I had never attempted before and is notoriously delicate (both in sugar form and in real life!). After a 20min crash course and intense practice overnight, I managed to pull this off..

Inspired by the purple colour theme and flowers from my own wedding I chose ombre ruffles and graduated bands to give the cake more dimension. The silver brooches were also made from silicon moulds I created in class to match the bracelet I wore for my wedding out of gumpaste and painted silver lustre.

The diagonal spray was also loosely based on the strap on my wedding dress bodice and you can also see the centre part of my bracelet which inspired the brooches above. I chose to make purple centres for the orchid for better consistency of colour. Pleased to say that 3 days of slaving over this cake has been preserved as it is now on display in the reception of the French Culinary Institute as it was a 100% dummy cake.

We were also taught how to create a whimsical cake where the theme was “grooms cake” (translation: no girly cakes!). So my teammate and I went for Beer Mug and a bowl of nuts and pretzels instead! We didn’t quite finish this one as it was supposed to have a beer can sticking out of the top to look like beer was being poured from above the glass but it still looks really fun.

The Final Project

My final cake took me some time to design – mainly because the theme was so wide (“My Dream Wedding”) and I had already designed a cake based on my dream wedding dress. I decided to use my chinese wedding dress which was made by Malaysian designer Zang Toi as inspiration for a few reasons. I loved the colour and the simplicity of the original dress and the beautiful lace details. I also wanted to pay homage to my Chinese heritage and make a cake that wasn’t just a white wedding cake.

The bodice was represented on the second tier with lace brush embroidery painted in gold after the icing had dried.

Colour isn’t something a lot of brides would generally order so this was a chance for me to indulge in something bold and totally luxurious. I made the design a little bolder than the original lace for higher impact with bigger flowers and a more organic look

 I chose a deeper burgundy than the original dress to avoid a christmas-like look, golden lotus flowers which took so much time to dry due to the humidity of summer in New York and I also added a Chinese-sylte willow tree on the bottom tier. The trunk of the tree is brush embroidered as well.

Some people have asked me why the top tier looks a little wobbly – this was because of a very soft praline mousseline filling that buckled the top tier after being cut. The judges who graded our cakes had to also grade them on taste so a slice was cut out of the back of each cake for tasting. Here is a peek behind the scenes at the back of the cake:

We then served portions to our family and friends who attended our graduation so more chunks came out!

Closing Time…
I thought instead of blogging about the lead up to finals I would just share this video which was a slideshow I made for graduation about the journey I’ve been on with my classmates. Enjoy!

What next?

As part of our finals week, we were asked to complete a business portfolio assignment which really forced us to think about my longer term aspirations in the cake world and what we want to achieve in the next few years. My business consulting background has really started to kick in here with numerous wild ideas tempered by business-minded realism that may some day turn into reality.

What I’ve learned about myself is that my one true passion is having an impact on others. Whether it is seeing someone’s demeanour change at the sight of a sugary work of art I created or a friend push themselves out of their comfort zone after encouraging them to go that one step further, I love changing someone’s mood or thought pattern even if only for a few fleeting moments. Even in my day job, I love coaching others and helping them to improve their skills or even just think about something a little differently.

So my ultimate ambition?

I’d love to teach and one day mentor people the same way I have been mentored and taught. That is a much tougher goal than you’d think because in the world of cakes, you need to be an absolute master before you can instruct. There is no halfway point. There is no concept of “those who can’t do teach” – and teaching cakes is a whole new level of hard. Here is where I give my biggest vote of thanks to my wonderful Chef Instructor Judy Lai (www.silkcakes.com) who not only runs her own cake business but was hands down the most phenomenal teacher I’ve ever had. Her affable personal style, goofy sense of humour and innate sense of professionalism really made her outshine every other teacher I’ve had and I absolutely loved the time I got to spend with this pocket rocket of a teacher absorbing her knowledge and being encouraged to push myself that one step further.

Here’s a pic from graduation that I love of two of my best role models – mum to the left and Chef J to the right! (they were sharing tips about chinese cooking I believe..)

With that inspiration in mind I return to Sydney next week with a longer term goal I will slowly chip away at with more practice, more cakes, more challenges and hopefully some new opportunities with some of Sydney’s best cake designers.

Armed with more knowledge, more confidence and more connections, I hope to bring you more cool creations and thank you for again making it to the end of another lengthy post!

A Cakespeare Special Episode: New York’s best bakeries


New York City: land of the high life, people who don’t seem sleep and gastronomic delights. It also has a ton of bakeries. Many, many bakeries.

For some strange reason, patisseries don’t seem to be common here whereas bakeries or hybrid bakery/patisseries are far more frequently found, sometimes in department stores and usually as standalone boutiques. Probably some of the most famous in the bunch (within Manhattan) include Magnolia, Balthazar and Francois Payard. Amy’s Bread is also very well loved and has a fantastic business name if I do say so myself ; )

In the name of research for this special episode, I embarked on the start of quite of a few bakery visits to get familiar with the best bakeries in New York. In my own personal bid to find the best baked goods establishment New York, I visited well about 12 bakeries or “hybrid” bakery-patisseries in the space of a few weeks. I’m sure this is no real record but it was quite an achievement for me and my oversized tummy!

Now after some extensive nibbling, sampling and a backlog in numerous kilometres required to be run before I’m back to an calorie neutral state, here are my top 5 picks for bakery goods or desserts in New York. It was very, very hard to decide and I’m sure plenty of people will disagree with me but this is just my take on it, feel free to comment vehemently if you violently disagree!

In reverse order…..

#5 – Carlo’s Bakery (Carlo’s Bakery Way, Hoboken, NJ)

Ok so these guys aren’t technically in New York. But it’s only a couple of stops away so it might as well be. I had to include them in my top 5 not just for novelty factor but the fact that their lobster tails and cannolis are very, very, very, very good. Very. Marks deducted heavily for pretty much everything else but the lobster tails and cannolis (especially the chocolate ones) make up for the rest of the bad stuff.

Lobster Tails

Cannolis

4. Levain Bakery (167 W 4th Street, NY)

Nestled in the Upper West Side in a tiny basement level shop, this place is definitely one for the cookie monsters out there. Specialism taken to new heights – this is by the far the chewiest, softest and biggest cookie you can buy that is of this level of quality in Manhattan. Hands down winner in the cookie category. Because of the cookie factor alone, it leapfrogs Carlo’s in my book. They also have locations in Harlem and the Hamptons and a cookie cam on their website!


Peanut butter by far the best..

# 3 – Balthazar Bakery and Boulangerie (80 Spring St, corner Crosby St, NY)
This place isn’t a NY institution for no reason. It has very good baked goods! Famous also for its brunch next door, the boulangerie offers a quick afternoon pick me up and the benches outside have provided a comfortable little spot for me to chill out many an afternoon after class and so some great people watching.

Sticky Bun – the caramel is a little too toffee-like but the fantastic gooeyness of the inside makes it worth the toothpicking afterwards!

Chocolate Raspberry tart – I only took 1 bite of this but it was decadent and delicious. Look at those plump raspberries too!

# 2 – Dessert Club Chikalicious (3 E 10th St, between 1st and 2nd Ave)

This funnily name dessert bar has some of the most indulgent yet refreshing desserts I have seen. They also serve a range of cupcakes and macarons with an Asian twist in terms of flavours but their most famous has to be the chocolate pudding and their “Lin-sanity” sundae.. The macarons here (along with every other place I have tried in NY were sub-par though…). I will let the photos speak for themselves.

Cupcakes

Chocolate pudding

Green tea yuzu lava pudding with lime sorbet

Drumroll…………..*cue dramatic music*

My #1 Bakery in NY is………Betty Bakery! (448 Atlantic Avenue,  Brooklyn)

The only thing I could fault about this place was that it was slightly out of the way. Betty is Cake Artist Cheryl Kleinman’s retail bakery in Brooklyn and it serves up just about the best cakes and pies I’ve seen in a while. It’s location did require me to be highly tenacious (I even walked in the rain to get here with nothing but a plastic sheet protector to cover my head carrying my ginormous duffel of school stuff) but it was well worth the trip and perhaps because it isn’t in Manhattan itself, made me like it even more. For a cake lover, plenty of eye candy in the windows and on the shelves inside, extra bonus points!!

I asked the staff to pick their favourites and was recommended the Carrot Cake and Blueberry Pie.

The carrot cake was one of the best I’ve eaten with some surprise coconut shavings for amazing texture. Not too sweet and very moist and dense, just the way I like it. The frosting was lickable and very light and fluffy.

My next favourite was the blueberry pie with a beautiful compote, not too sweet and the blueberries still juicy and plump with a crisp crust that was too thin or thick. No soggy crust at the bottom too – extra marks here!

Next on the hit list – the sea salt caramel chocolate tart…. I have only one word for this. Phenomenal. That’s all.

I told the friendly staff that I was rating Betty #1 and they got excited! Which really just cemented the decision.

On that fine note, I’ll round out with a few honourable (and less than honourable) mentions and my recommendations on what to order if you do go and visit them one day…

Honourable Mentions

Epicerie Boulud:  Raspberry tart, Chocolate tart. Fun for other non-sweet related stuff too.

Empire Cake: Homemade Twix Bar is my recommendation

Bouchon Bakery: Pistachio Croissant (don’t get the Bouchon, it’s a rip!)

Eli Bazar: Fabulous pastries and their bagels look great. They also serve gelato which is an added bonus!

Amy’s Bread: You can’t go wrong in here – it’s all good.

Less Than Honourable Mentions

Francois Payard: Highly overrated macarons and very overpriced. Disappointing. These are supposed to be NY’s best as well!

Laduree: Apart from the pretty factor, this place is pretty much all packaging. Macarons were disappointing and not worth their inflated price – go there and snap your photographs but don’t buy anything!

Magnolia: I think we should all just agree that this place is still living off its SATC fame when it really doesn’t deserve to! Disappointing and average.

Disagree with my top 5? Post a comment below and let’s bash it out!

Cakespeare in the City: Episode 4 – Silicon, Sugar Flowers and some sightseeing!

Well it’s been another few crazy weeks and things have been so hectic with a myriad of new techniques, exams, weekend trips and friends in town that I’ve barely had a spare moment to reflect!

Sugar, Sugar and more Sugar…

Sugar flowers and pulled, blown and poured sugar were the themes of Unit 3 of the course with over a week dedicated to the art of sugar flowers and another week on pulled, blown and poured sugar techniques. This was where the really fun, interesting stuff happened as I’ve never used these techniques before and working with highly technical materials and methods definitely pushed me into my “learning zone”.

We began with sugar flowers and learned the Chef Ron’s methods of how to make our own gumpaste and made a whole host of flower centres and petals. We covered a variety of flowers including the classic rose, the peony, tulips, stargazer lilies, calla lilies, orchids and whole host of different filler flowers and buds including the sweet pea and hydrangea.

Sugar flowers are hugely painstaking and extremely time consuming but the results are so worth the work. We spent well over a week on this unit and for me the greatest learning point was how to properly wire the flowers and then the artistry of dusting the petals to really bring them to life. It was my first time dusting and it’s amazing how much time it can take to really layer the colour onto each petal to get the flowers as realistic as possible.


Ron Ben-Israel style roses before dusting

What a difference a little dust makes!

For me, there are so many things about sugar flowers that will takes years of practice to really perfect and get efficient at including small details like how to cut every petal perfectly without furry edges or having just the right thickness of petal so that you achieve the realism of a ruffled edge and delicate beauty of a real petal. The beauty of this section of the course was also how we were taught to use 1 set of cutters to create all the flowers. Being able to improvise and economise is essential in any business and the business of sugar flowers is the same – cutters are expensive and there is a cutter for nearly every type of flower there is. When you think of how many flowers there are in existence, it makes you realise that sugar flowers is a whole other world of cake decorating in itself and you could literally spend years just doing flowers. Some of the best sugar flower artists in the world make their sole living off teaching others and travel the world to do it. What an incredible job!

My first ever sugar flower posy in a pressed sugar vase

Suffice to say that I now look at flowers, flower beds, bushes, gardens and any other type of flora differently when I walk down the street. Sometimes I stop to inspect them closer and I have to confess I’m usually looking at them thinking “now how could I make that out of sugar?”. To a whole new extreme, my Chef instructor even recommended dissecting flowers to really understand their anatomy and composition!

Here’s the posy I made for our final flower exam where we had to make at least 1 full rose, 1 half rose and 2 buds plus any filler flowers we chose.

I decided to go with purple blue moon roses and love how they turned out!

Our exam flowers lined up for grading

My favourite flower by far was the large open peony followed very closely by classic rose. Giant flowers are trending hugely at the moment and they seem to be on every wedding cake I see. I also really enjoyed learning how to make the filler flowers which only require manual dexterity and a very very sharp pointy pair of scissors – the fillers with the yellow centres above were created this way. So amazing how a small ball of sugar can be turned into something beautiful! Blows my mind!

Silicon Moulding (non-cakies feel free to scroll ahead!)

I’ve written briefly before about silicon moulding when Chef Ron Ben-Israel came to school to give a demo on the technique. Whilst it was great to watch a demo actually getting to try the technique and create our own moulds was even better. Using a variety of objects such as beads, brooches and other ornaments that could be moulded into fondant or sugar decorations, we were stepped through the process of mixing and pouring our own food grade silicon and creating our own moulds on plexiglass using clay.

We also learned about how important it is to pour the silicon very slowly to remove air bubbles and painstakingly poked every single air bubbles out of our moulds. The best part of this was unmoulding the next day – so fabulously rewarding to see the interesting shapes pop out of our very own moulds and then to immediately use them to make sugar decorations.

Pastillage castle with poured sugar base and flowers

Feeling hot, hot, hot…

After we wrapped up sugar flowers we moved quickly onto poured, pulled and blown sugar. I absolutely loved this unit – not only because of the amazing things we were able to create but also because it was a whole new medium that I have never dealt with before and in fact feared a little. Often seen as the realm of talented pastry chefs, pulling and blowing sugar is again a whole world of artistry in itself. We learned how to make poured sugar first and also worked with isomalt which is type of sugar from beets invented in Germany for diabetics.


Check out this photo diary on my Facebook page for a more photos behind the scenes!


Blown sugar using a hand pump – incredibly hard!

In between all these great new techniques I managed to also do some sightseeing around New York. We covered the Hamptons, Connecticut and Coney Island over the last three weekends – all poles apart and very interesting places! Recently I also caught a Yankees game with one of my very best friends, Bec, who was in town from London, it was surprisingly enjoyable and I’ll be taking my parents there in July!

Jumping with glee at Ocean Road Beach, Southampton

Bec and I outside Yankee Stadium

*drumroll..* Carlo’s Bakery Visit!

My last post left off with the long-awaited trip to Carlo’s Bakery of Cake Boss fame so for those who have been waiting to read about this, here’s my own two pennies’ worth on the famed bakery.

My friend Marcia and I ventured out across state lines to Hoboken in New Jersey on the New York Metro to check this place out.

Getting into my “Hoboken Baby!” mode

We decided a Friday afternoon after class finished would be best as there probably wouldn’t be any lines and luckily there weren’t!

Carlo’s famous shop front

After about 5 minutes in the queue outside, it was still a good 20 minute wait for service however once inside so we had ample opportunity to take lots of photos as the ticketing system meant no waiting in line.

Here are some of the pics I took of the interior which you might recognise from the show if you watch it:

The infamous consultation corner where Buddy used to meet a lot of his clients

The crowd


The family portrait on the wall of the Valastros

It was interesting to read the articles on the wall and see the pastries on offer in the big glass counters however we found that a lot of the display cakes were quite dusty and tired looking. I felt that an overhaul of these with some new designs would have been great given the foot traffic they get through the doors from visitors near and far means most people come in with high expectations.

This one was a pretty cool design though:

The pastries were by far the highlight of the trip and this for me was the major saving grace. I bought some cannolis, the famed lobster tails and a variety of cupcakes to try and all were very, very good. I even indulged in a little early birthday present and bought a copy of the Cake Boss Season 5 DVD autographed by the whole family for a pretty cheap $20 which I felt was pretty good value! The pastries we ordered came in cute little white boxes and some traditional baker’s twine which was a nice touch.

Holy cannoli!

Marcia and I plonked ourselves on a bench outside the shop on “Carlo’s Bakery Way” and immediately dove into the giant and very rich lobster tails and I had polished off a chocolate cannoli before I even got home. Filled with a smooth creamy custard with a crisp outer shell with layers of buttery pastry, the lobster tail-shaped pastries were by far my favourite. The cannoli was also very good with a very crisp shell and more-ish ricotta filling that wasn’t too sweet.

Lobster Tail goodness

Carrot, Red velvet and Peanut Butter cupcakes

Out of the cupcakes my favourite by far was the chocolate peanut butter – amazing frosting and very flavoursome cupcake without being at all dry or too rich. I found the red velvet and carrot cupcakes both quite disappointing and a little dry. Then again, I’m not a huge red velvet person in general and haven’t yet been able to understand what all the fuss is about with this type of cake.

Now I must confess that one of the things on my NY bucket list was to eat Carlo’s pastries whilst watching Cake Boss on the giant projector screen in our apartment. Sounds a little tragic but it’s true. Good news is I ticked that one off the list the very next morning after my Carlo’s Bakery visit with Mr Cakespeare! It was such a great way to kick off a weekend. For the more health-concious out there, you’ll be pleased to know that we went for a jog in Central Park afterwards in an attempt to burn off some of the calories!

With less than a month to go the journey so far has been incredible – exhausting but incredible. Our graduation is fast approaching and there are 4 big cakes on the cards in the next 3 weeks with 1 big final exam cake where external judges will be coming in to grade our work on the day of graduation. Scary but true!! I’ve learned so much already and the experience has certainly had it’s highs and lows but pushing myself outside my comfort zone time and again, learning how to work with greater discipline and making new connections have really been the best parts of all.

Can’t wait to share my next few cakes with you all…. we have a topsy turvy, carved doll, handbag and wedding dress cake coming up – all in the next 2 weeks! Stay tuned!

Cakespeare in the City: Episode 3 – Celebrities, Chefs and more cakes!

It’s been another few weeks and I’ve had a whole new collection of crazy experiences – crazy good and crazy busy. Which means posting has been a challenge. Throw in a couple of bouts of illness and jetlag from a trip to London and you have one very tired Cakespeare!

As I sit here and reflect, it’s nice to take a moment to really savour all the surreal moments I’ve been having on a daily basis here in New York.

All the while, my own personal Jiminy Cricket sits on my shoulder constantly reminding me that no matter how tired I feel and no matter how challenging it can be to get up at 6am every morning to churn out cake after cake, this is all a huge privilege and luxury and that in the not too distant future, I will have to crash land back to reality and normality. It certainly has been strange living in a bit of a bubble!

A brief aside….

Now I know that I haven’t really talked a lot about my actual cakes or New York experience in the last couple of posts and have neglected to post photos of these up. Even my mother has complained that I don’t tell her enough about my New York experience! So I feel I should explain myself.

We’re nearly up to 1.5 months in the Big Apple and I’m only just starting to feel a lot more settled in a regular routine of a 6am wake up, hopping on the subway to class (all the while thinking I’ve left something important at home which I did this week- my chef pants!), climbing a bajillion stairs up and down subways and at the FCI, manically changing in the morning to mise en place before class starts and then carrying my massloads of equipment and tools down to class like a saddled donkey.

An average day usually means a lot of baking or prepping cakes for decorating before lunch and then we settle into decorating in the afternoon. By the time we’ve had lunch at Family Meals cooked by the FCI Culinary Level 4 students, the afternoons feel very short as we have to have the place cleaned up by 2:30pm and be out of the kitchen. Today was the first day we actully spent the whole day just doing decorating and no mixers came out from the storage room.. It was total bliss and yet crazy hectic in a totally different way!

Classes have become a lot more intense in terms of content covered and the schedule every day is totally manic so there really is a lot less time for me to whip the camera out and snap photographs during class. And my hands are usually covered in some kind of sugar or grease which makes photography difficult. I generally have to cart my cakes home to properly photograph them in my rather dark apartment where lighting is not the best.

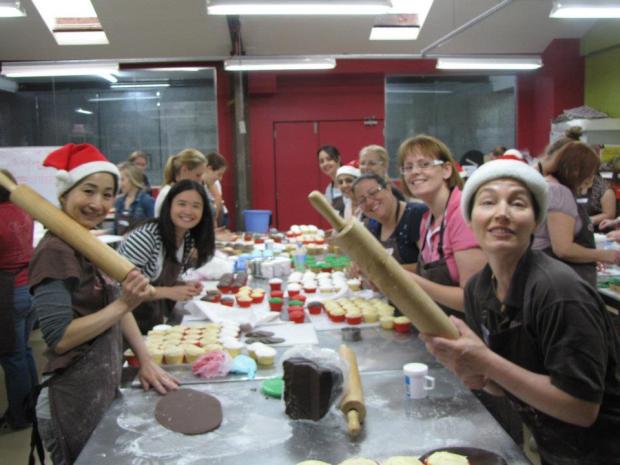
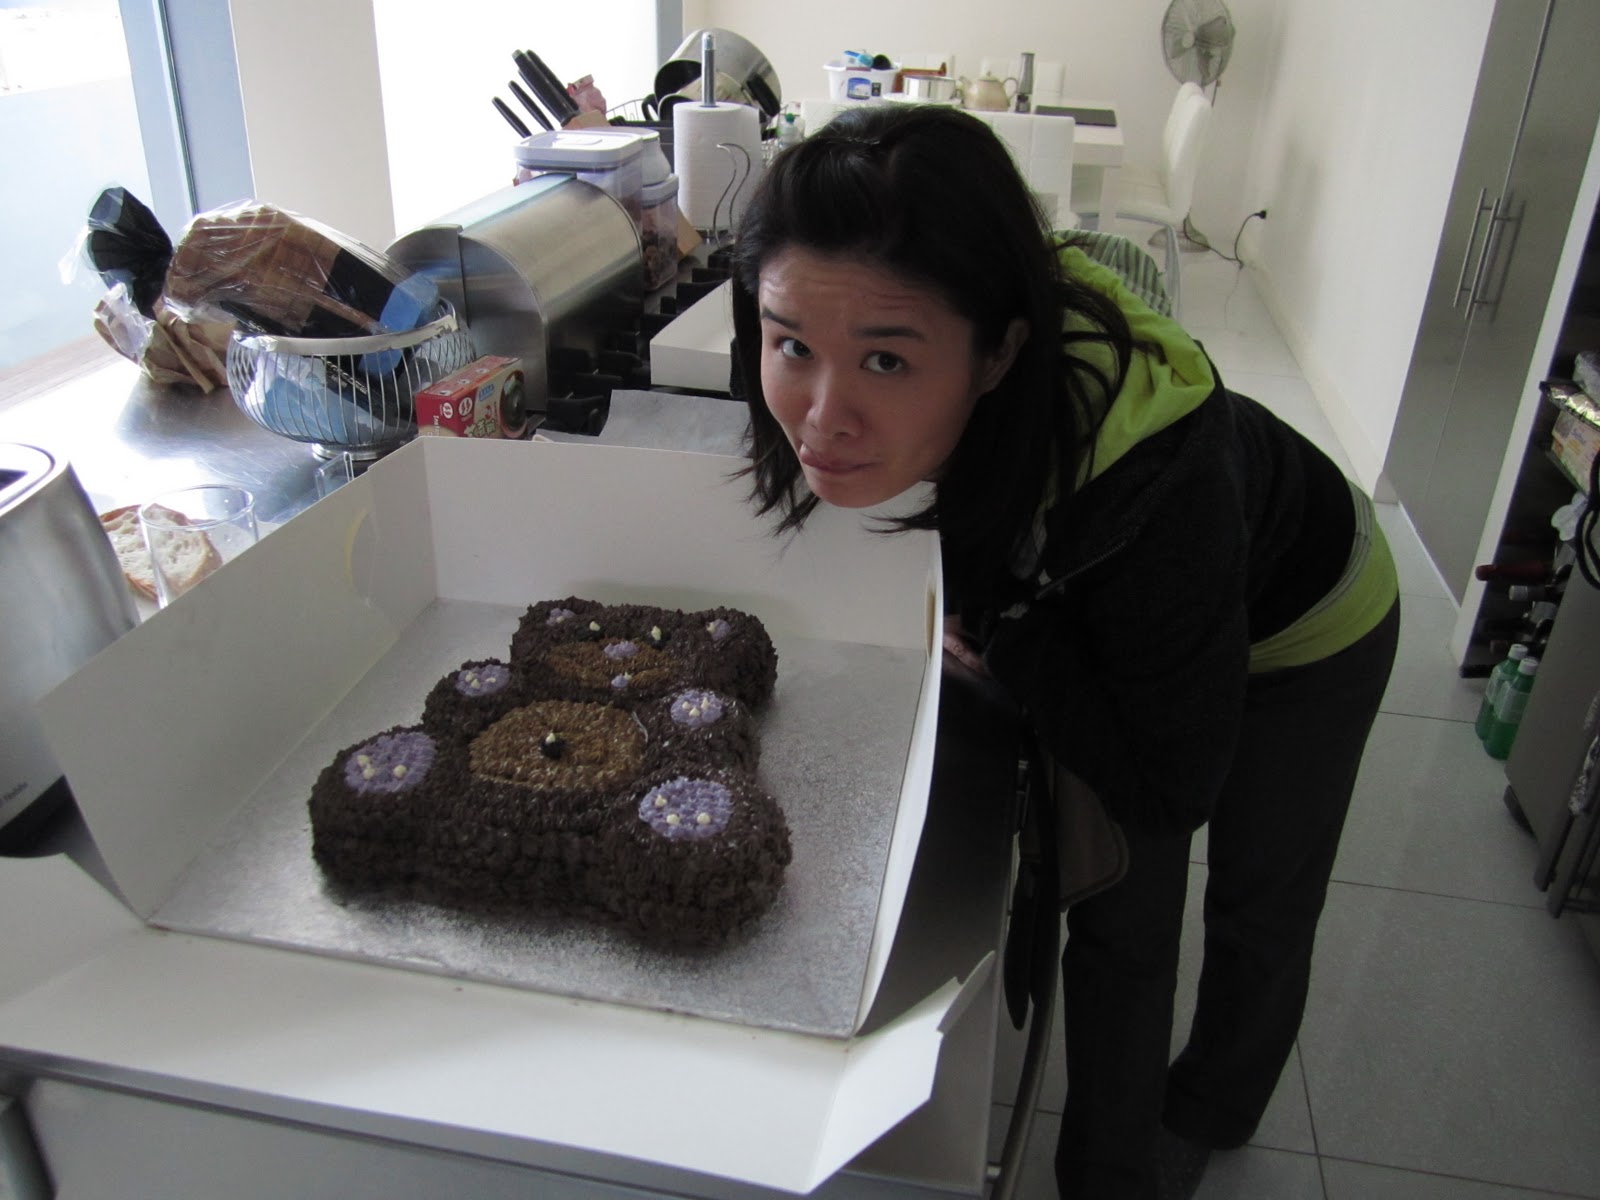
So here’s a mini gallery of the cakes I’ve made in the last couple of weeks – they were all fairly straightforward in terms of decorating and it’s not my best work but bear in mind that most of my cakes I’ve done in the past I usually spend 3-4 nights doing whereas these cakes were done in around 1-1.5 hours on average! Maybe 2 hours of solid decorating time at most. So given that, I am actually pretty pleased with the results. They represent the foundations upon which we will be building much larger, more complex cakes as the course steamrolls ahead into Unit 3.

After class each day, it’s usually a brief jog or home to just relax for an hour or so before heading out for dinner or cooking dinner at home. I also hop online to catch up on the days emails, facebook messages and weekend planning to maximise my time in New York. Not checking my emails during the day is in itself is a stark change in reality considering that, back home, I carried a blackberry with me everywhere and would check emails pretty much every 10-15 minutes. With no cell phones for the majority of the day in class, it’s certainly been a nice partial disconnection from the mobile world.

Connecting with the girls in class has also been a really interesting experience with a whole range of talents and personalities to really get familiar with. The environment can sometimes feel like a pressure cooker with high intensity, quick pace (Chef constantly rides us about timing and getting cleaned up on time) and often even small things like waiting to use shared resources can seem to add that much more complexity to the day. What I’ve observed is that there isn’t a single person in our class who is fabulously talented in their own way and every person has a story – I don’t know them all extremely well yet but I’m starting to and bonding with the girls has been a really interesting experience. We unite over a common experience and working in such close quarters every day makes this a very unique and strong bond. Naturally there have been some that I’ve bonded with quicker but we get rotated in terms of teams (pairs) and superteams (fours) every unit which means I’ll get to run the whole gamut of personalities by the time this class is through – more life experience to clock up! I’m also the second oldest person in the class which is a little different for me as I’m used to always being one of the youngest at my day job. None of these girls have worked a corporate job before and most are just starting out and working out what to do with their lives. Whilst I’m never one to feel old, I definitely think that my life experience has helped me to connect with nearly all the girls in the class.

Back to Cakes and Celebrities…

Ok so I’ll now get to the real point which is what I’m sure most of you have been waiting to read about: famous people.

No doubt those of you who follow my facebook page would have realised that I had some encounters with two legends of the pastry world in the last couple of weeks. The first was a demonstration that Ron Ben-Israel did on wedding cakes and silicon moulding (which I’ll talk more about later).

The FCI has a unique student volunteer program where if you’re quick enough, you can usually help out some of the most famous chefs in America or assist at some of the most prestigious culinary events around including the James Beard Awards, even if just for a few fleeting hours. A few weeks ago I was allowed to assist Jacques Torres one week later at his croissant and bomboloni demo which was pretty much AMAZING. Having now been on both sides of the demo experience at the FCI, it was actually more fun to be in the audience but I absolutely loved being behind the scenes and having rare, privileged access to work with a total master for just a brief few hours – every single minute of which I’ll remember for a lifetime!

Jacques Torres can probably be best described as an extremely energetic Frenchman – a real character. He exudes a crazy vibe in every sense of the word – from his quirky  quips to oddly screwball jokes and almost child-like level of energy about even the smallest of things. He literally bounces around everywhere and is constantly on the move and yet with certain small things, he is very precise and concise. For example, when he asked me to lay out some pre-made croissants on a sheet pan to bake, he wanted exactly 4 rows of 5 evenly spaced and the sheet pan had to be landscape, not portrait in orientation.

I arrived at the FCI theatre 1 hour before the demo was to start and no mise en place had been done – I mean nothing. It was a totally different setup in the kitchen and about 1/10th of the size of the kitchen I was used to working in. No organisation whatsoever and I had no idea where to find anything.

Jacques then asked me to make 3 quarts of pastry cream (just under 3L) and asked if I knew how to and even though I nodded the expression on my face must have told him otherwise as he then proceeded to write down all the ingredients for me to run 3 floors up the stairs to get. The best part was the instant nodding and obliging that happens when you mention what you are doing or getting is for Chef Jacques – nearly everyone just clears out of the way or helps out. It was pretty cool. Even when we had to invade the evening pastry class’s oven to bake extra croissants to take home after the demo, Chef Jacques popped his head into the class to see how I was going with the ovens and nearly every head whipped around to say “hi Chef Jacques”. Pretty damn cool.

After numerous trips to the bread kitchen to fetch flour and sugar, checking the ovens and bread prover (which by the way looks like a giant wine fridge and actually just speeds up the gluten formation process in doughs) I then helped to fill around 120 amazing bomboloni (essentially Italian doughnuts filled with pastry cream), I was allowed on occasion to stand behind Jacques during the demo to assist him with cleaning up different implements and bringing him simple things like an egg wash to then glaze the 60 or so pre-made croissants for the audience.

By the time I got home I was pretty much spent. I literally had to sit on the couch for 30 minutes before I could move. My reward? a box full of croissants and a fist bump from Jacques Torres. Oh and he did make special mention of us little oompa loompahs out the back after the demo was done and the audience gave us a nice round of applause to say thanks for our hard work. In two hours we turned out 60 croissants, 80 chocolate croissants and about 120 bomboloni. All in a kitchen the size of my bathroom. After the crowd dissipated, Chef Jacques apologised for making me run around so much but said that I did “really really good – excelent”.  Maybe if I liked baking en masse more I could work for him one day! Pity high volume work is not really my thing…

For my full gallery of pictures at the Chef Jacques demo, click here.

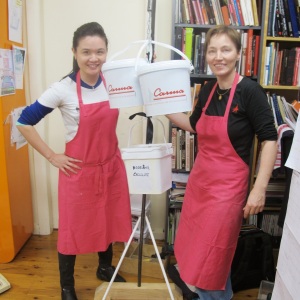
Chef Jurgen, me and Chef Jacques Torres

The Sweet Genius

So Ron Ben-Israel is a famous man now. Mostly in part due to his rather eccentric characterisation as the host of the Food Network show “Sweet Genius” where he is portrayed as a bit of a mad Willy Wonka-esque pastry chef/cake master of a “million dollar cake empire”. I’m not sure the show really does him justice but it apparently just signed a 3rd season and he has garnered a huge following from it.

So much so that Chef Ron commanded a packed house at an unadvertised event and even a small child of one of the Culinary students came along bearing gifts of colourful erasers and an older lady who smuggled a bottles of Everclear alcohol (Aussies read this as up to 95% alcoholic turps) from across the border in New Jersey for mixing with decorative lustre dusts and applying to fondant. This stuff is so strong that it’s illegal in the state of New York.

In what ended up being a 2 hour long demo, I really got to experience Chef Ron at his finest from a dead centre front row seat. There were moments where his strict adherence to his “no talking whilst I am demonstrating because it’s distracting” rule felt a little confronting to watch but overall, it was still a marvel to watch him at work. He exudes a sense of rigour and control which I can only really explain by his background as a ballet dancer which would have been extremely regimented and disciplined. At points we were asked to wait til he was ready for questions and he asked for no talking from the audience a few times whilst he was demonstrating as he found it too distracting. However he is also extremely funny and knows how to make the audience laugh which is probably part of the reason why he’s gained such a big following.

Whilst stacking this cake, Chef Ron asks “Is it straight…? The cake I mean..”

Chef Ron walked through the entire process of a wedding cake from construction to dismantling it for service. There were so many interesting pointers that I took away from the demonstration but in the interests of keeping you awake, I’ve chosen the top 10 most interesting points.

** Non-cake decorators feel free to scroll ahead to the next double asterisked comment!! **

  1. Granite is the best surface to roll fondants and doughs out on. Stainless steel has bumps so it is less preferable.
  2. Ron still uses the old-fashioned technique of using a piece of string to work out how large to roll out fondant to cover a cake
  3. Ron never uses cornstarch to prevent his fondants from sticking to a counter surface – only powdered sugar. And he has a mirror in his bakery to see the back of cakes whilst they are being covered or constructured
  4. Ron uses a mitre box for cutting dowels which can be purchased from craft supply stores – he never uses shears as this can splinter the wood and always sandpapers dowels before inserting into cakes to remove all traces of splinters
  5. The only non-edible materials on Ron’s cakes are ribbon to trim edges of his masonite boards and adheres these with non toxic kids glue
  6. Ron’s paper scissors kept separate to fabric and fondant scissors – each have their own little ribbon!
  7. Ron uses a smoked fish slicer from Bowery to cut the cake because it has no “teeth” like serrated knives and is super sharp
  8. How to cheat if you get cracks! Chef Ron uses a little confectioners buttercream to fill in the cracks
  9. Ron believes all cakes (especially those with buttercream) must be refrigerated and that fondant that sweats is a myth – it only happens if you have a bad fridge or no air conditioning! (I must say I’m not a 100% convinced on this one – in my experience it definitely still gets sticky)
  10. Lastly…. *drumroll*… Satin Ice is apparently now developing a new formula which makes it more resistant to tears and cracks which a lot of people have apparently complained about in the past!

Fundamentals of Silicon Moulding

This is a complex topic which requires a whole post in itself but I’ve just noted the quick points here for the most enthusiastic of decorators and those who wish to compare techniques. Overall, it was exceptionally interesting for me to observe the types of innovation and interesting decorations that Chef Ron has created or discovered himself, whether through walking through a store that sells vintage door handles that make pretty swags for cakes or creating the most amazing hand sculpted replicas of the most intricate brooches from sugar before creating a silicon mould to make identical replicas a hundred times over.

All the complex silicon moulding technique aside, I had to make a mention of this particular point for my teacher in Sydney – (Lorinda!!). For quick jobs, Chef Ron uses amazing mold putty to make moulded decorations because it is FDA approved for food. This is the quick putty of choice for Lorinda too and I loved that he pulled out the same box that I’ve seen her pull out in her class! Just makes me realise that she is definitely world class! This stuff is pretty much as the box says – amazing! It consists of two play-doh like compounds that when mixed together and pressed onto an object takes exactly 3 minutes to react and bond then 20 minutes to cure before becoming a bake-proof, wash-proof and fully food safe non-toxic silicon mould. If you think about all the things you could make from a mould the possibilities are totally endless.

Chef Ron shared tray upon tray of his most interesting moulds with us from some of his past projects.

The best part of Chef Ron’s demo was when he whipped out some pre-made petals and started assembling a black sugar peony right before our eyes whilst he spoke rapidly about sugar flowers. This is really when he was at his “ooh ahh” best. He then pulled out a travel steamer to gloss up the petals and then sprinkled on rainbow dust to give the flower an ethereal and almost eerie feel – the effect was totally, totally stunning. Each petal had been textured with silicon imprint mat and individually wired before being wound tightly with florists tape… it took him a total of 5 minutes to create this amazing flower. Now THAT is sweet geniusness at its best.


** Non-cake decorators feel free to stop scrolling here!! **

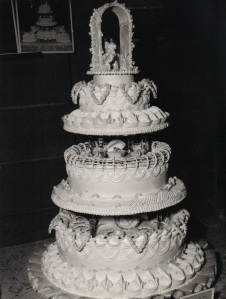
Here’s a pic of the final cake:

Testament to his level of rigour and discipline, Chef Ron also dedicated time to explaining how to properly dismantle a cake:


And to top it all off we all got a few slices of cake – a deliciously moist vanilla and chocolate butter cake with peanut butter filling. Talk about YUM – for a hater of buttercream, this stuff was GOOD.

Layers of Chocolate and Vanilla buttercake with peanut butter filling. Yum. (Notice too how thin the fondant is at only 2-3mm).
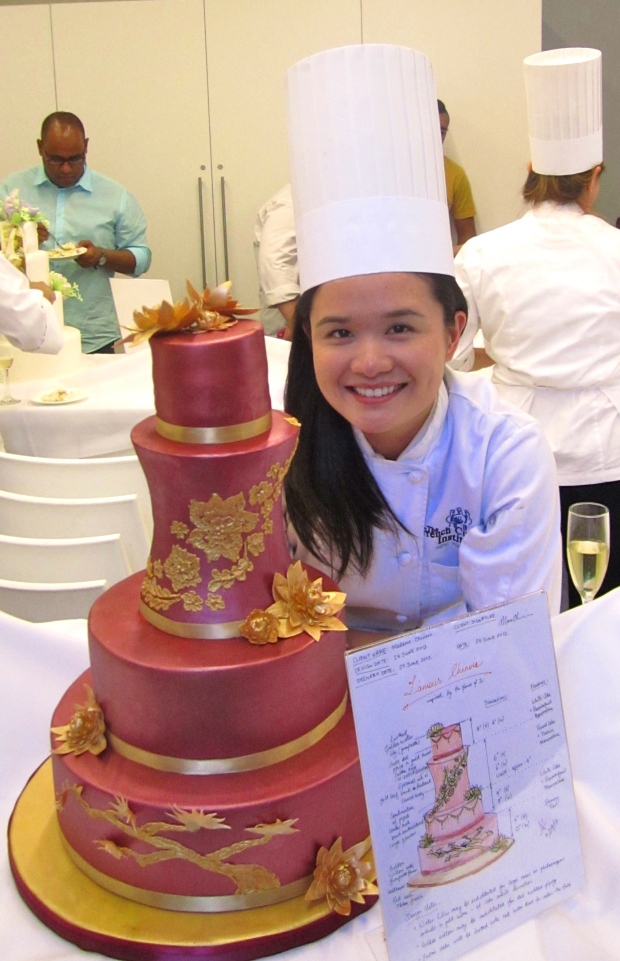
Me with the man.

A great lady named Dorothy

The average person would probably never have heard of Dorothy Cann Hamilton. But this lady has done so much good in the culinary world, she is pretty much connected to every famous chef known to man in some way or another. As the founder of the French Culinary Institute (now re-branded to the International Culinary Center), Dorothy has been knighted by the French Government for all her work in the culinary arena.

As an international student, I was invited to a cocktail evening at Dorothy’s apartment which allowed us a glimpse of New York from a high rise apartment in the Upper West Side.

She welcomed us as family – recalling during a short speech about how when she was an international student, she found the experience overwhelming without support and that sometimes having family away from home can make the experience abroad that much better. Her goal was really just to let us know we had a family on tap through the FCI and that long after we graduate, we could always return “home”. Sounds cheesy when I write it – much more inspiring when she said it!


Dorothy is also someone who can command a room just by being present and yet make every person feel like they’re her best friend – she is a true master in the art of conversation. I was in awe observing her as she worked the room and gave every individual unique attention. She also had an uncanny ability to remember every one of our names and she never forgets our face. I had a great chat to her about the food scene in Australia and the program I’m in. Since then, she’s been back in our class a few times bringing VIPs through on school tours and each time she stops to say hello and ask how I am, addressing me by my name.  All because I met her once and shared a couple of champagnes with her in her apartment. That’s pretty a special skill.


Just in case you haven’t seen enough celebrities in this blog yet…

Part of the hectic after school planning means I find out about as many culinary events as I can and then try to go. I managed to score a last minute ticket to a sold out event at the DeGustibus Cooking School in Macys Herald Square to see April Bloomfield do her thing. April is best known as a female version of Jamie Oliver in the States, best known for her love of all things porcine and for her three amazing restaurants – the Spotted Pig, The Breslin and The John Dory Oyster Bar.

In fact the first weekend we were in New York, we had already organised a table of ten to share in a whole roasted pig in a 3 hour feasting extravaganzy (my version of a crazy extravaganza):

Here were some of the dishes we were served at the great tasting demonstration:

I don’t eat usually chicken livers but this chicken liver toast was amazing..Sweet and delicious

I make split pea and ham soup a lot but mine never tastes as good as this one!

A filipino rice dish adapted by April – very flavourful and hearty.

April’s banoffee pie with Dulce le Leche made from scratch (ie boiled for 5 hours!)

Me with April

To round off a mammoth blog post, I thought I’d finish off with one last famous face from home.

Testament to the power of the FCI brand, many famous mega-stars walk its corridors on a daily basis. Bumping into Curtis Stone at lunch was pretty special too! ok so maybe my classmate Marcia and I dropped our lunchplates and practically ran down the corridor in our whites to get a photo with him… but I just couldn’t resist sharing this special picture with you all! As the new host of “around the world in 80 plates” on the Bravo channel in the US, his face is plastered pretty much everywhere in the city. I think this guy is probably one of the most successful chefs around having conquered both the US and Australia.

This man requires no captioning..

Until next time…

I will have to stop here and blog about my Carlo’s Bakery experience in my next post on the best bakeries in New York City… I fear that the majority of readers have probably fallen asleep but I had so much to say this week, I really couldn’t contain myself to just one topic!! In my next update, I’ll cover internships, midterm madness week and more cakes of course!!

Cakespeare in the City: Episode 2 – Buttercream, Blowtorchin’ and more Baking

Maybe because I’ve never been exceptionally fond of washing up, I found the second week of C-school a little more challenging because of the amount of baking (and hence washing) we were doing. Don’t get me wrong, we are pretty spoiled as culinary students at the FCI as we have full time dishwashers for the big stuff but I’d like to now also state for the record that I do not, will not and never will enjoy washing up buttercream from mixers, spatulas mixing bowls, paddles, whisks or any other type of kitchen implement. It’s just plain gross. Give me royal icing which washes off without any grease any day! Probably means I am not cut out to work in a bakery or use a lot of buttercream in my cakes…hmm.

Anyway I digress.

First of all, let me apologise for the lateness of this post, it’s been a very hectic week with 3 exams (1 prac, 2 written) and our first grading on general skills in the kitchen. First time I have been graded on anything for about 6 years so it was a bit of an out of body experience getting my results. In case you are curious about how I did, I was very happy with the grade but didn’t place a huge amount of importance on doing super great, I just didn’t want to flunk out and kicked out of the school and the passing grade at the FCI is a minimum of 70%!

So what did I learn this week?

Whilst the first week was very much about perfecting the art of La Genoise cake and making every type of buttercream that exists, the last couple of weeks was more heavily focused on piping work, foundational decorating skills and a whole lot more baking.

Ready, set, mise en place!

My days usually start with a crazy “mise en place” of about 15-20 minutes bright and early at 8am. Mise en place refers to having everything (equipment and ingredients) prepared, in its place and ready to use on the Chef’s instructions. So this means studying the recipes the night before and ensuring I have little recipe cards ready to weigh all my ingredients and knowing which tools to lay out hand on large trays from our mammoth toolkit. I historically haven’t been great at this and part of the reason why I wanted formal training at the FCI was because of the discipline they instil in you. When I’m working on my cakes at home, I’m a mess, there’s usually tools, equipment and cake crumbs everywhere (especially when I’m carving a cake). So one great thing so far is that my discipline has definitely improved in the last couple of weeks.

Having said this, the class sets a frenetic pace with 4 pastry arts grads who have worked in restaurants and bakeries already so rapid mise en place is a piece of cake (pun intended) for them. It’s so easy in class to get caught up with being the fastest, the most prepared or the creating most perfectly finished product. On the first two counts, I have to say thank you to my good friend Marcia from Brazil for reminding me about the importance of living the moment and really enjoying the process – not getting caught up or worried about being left behind or slow. She sings in class to remind herself to enjoy the moment and when she does, it also reminds me to enjoy my moments! On the third count, I will not compromise the quality of what I do, even if it means taking a little extra time. I believe that this is what differentiates you as a decorator – yes you have to work fast to make money but you also have to produce a great product. Rushing to save a bit of time or money is not really worth it if you aren’t happy with the results. This training experience has been a great test for me in terms of catching myself every now and then in class to really stop and savour the moment or the experience. Sure I get annoyed and irritated at times with myself or am always wondering why I’m usually one of the last to finish up, but then I remember that I also take on extra tasks to help out the Chefs – this may be in part because I’m used to taking on more workload than is probably healthy for me and I always have a problem saying no when someone (usually at work) asks for help. Anyway, enough ranting from me and back to cakes.

“I can’t believe there’s so much butter!”

Having an exam this week meant we had to actually internalise some cake theory which was also tested in our practical exam. We got tested on genoise, buttercreams and numerous terms and temperatures for different recipes. I must admit I have struggled with this American Fahrenheit business. Makes zero sense to me!! Celsius is far more logical in my book…

We made every kind of buttercream under the sun this week. So much so I’m totally sick of the stuff… and I also pretty damn averse to butter now. There I said it. Now every French chef can spit on this blog! In a slight tongue-in-cheek tribute to how crazy the butter levels were this week, I even made some of my classmates do “I can’t believe there’s so much butter!” poses which was a bit of fun whist we waited for our mixers to whip away at the stuff…


Glove-ing up to prevent buttery hands

Marcia “I hate buttercream so much but I look slightly scared of it here” Junqueira

Marti “I can’t do non-angry buttercream faces” Nardo

On a slightly more serious note, there are 4 types of buttercream and they pretty much cover half of the European continent by name! The buttercreams are: Swiss Meringue, Italian Meringue, French (pate a bombe) and German Mousseline.

The Swiss method requires cooking of egg whites with sugar over a water bath whereas Italian meringue (as used for the italian macaron) is adding cooked sugar syrup at the “soft ball” stage to egg whites. The French buttercream is essentially french meringue (uncooked sugar and egg whites) beaten with butter and the German mousseline is as the name suggests, more ‘moussey’ in texture and more akin to a filling than a hard-setting buttercream as it begins with acreme patissier(a stirred custard pastry cream).

My personal favourite is the mousseline as it’s the least buttery of the four. I also like the swiss buttercream because the exclusion of yolks means you can achieve a snow white buttercream which is nearly impossible with all the other types of buttercream. I also learned that what we call buttercream in Australia is actually frosting (equal parts butter and icing sugar).. so all my previous misconceptions of frosting have now been corrected! 🙂

Burn baby burn!

We also learned all about custards last week…. this has been one of my favourite components by far because we got to bake a beautiful vanilla bean creme brulee following a great recipe from the famed Le Cirque restaurant – the smoothness of this custard was totally to die for.

One of the best part about creme brulees is getting to handle a giant blowtorch. The one I have at home is about 1/10th the size of this one and you do feel quite powerful and dangerous when you have one in your hands… The only upside of buttercreams is when you have to rework them from the fridge, you also get to wield the almighty blowtorch to heat up your mixer bowl… woot woot! I’m sure if I was  seasoned chef reading this, I would think that I am totally lame but please do indulge me in a couple of culinary newbie moments…

Can’t really beat the satisfying crack of a creme brulee crust!

More baking…

We made quite a few different cakes the last couple of weeks but I’m almost ashamed to admit one of my favourites was a plain white cake. We made a delicious passionfruit mousseline filling for it and the cake was apparently devoured very quickly when Mr Cakespeare took it to the office – 200 bankers + 1 2 tier cake = happy campers.

Assigned baker for the week Seraphina does a quick pose with our white cakes

We also did a lovely angel food cake which tasted very similar to a spongy meringue cake and decorated it in a traditional basketweave and topped with fresh fruits. Marzipan modelling was also covered with a fun fruit making session and lots of plaques to practice chocolate writing. I’ll post photos up on facebook soon!

Celebrities chefs galore…

One of the really brilliant, brilliant, money-can’t-buy sides of being in such a legendary school is the daily exposure you get to fantastic chefs of the highest calibre. Jacques Torres dropped into our class the other day to make marzipan flowers, Ron Ben Israel was in the theatre yesterday to do an amazing 2 hour detailed demo on silicon moulding and wedding cake basics and bumping into decorated chefs every day is so normal that everyone is super-nonchalant about it (except wide-eyed newbies like me).

In the next episode of Cakespeare in the City…

For those who follow my status updates on Facebook you’d already know that I found out a couple of days ago that I’ll be assisting Chef Jacques next week in a pastry demo (chocolate croissants and other yummy baked goods). I am so excited about this amazing opportunity!! I can’t wait to blog about this one and I’ll also be covering a visit to Dorothy Cann Hamilton’s home, even more exciting tips and tricks from  the Chef Ron demo and my first visit to Carlo’s Bakery! So much to blog about it’s overwhelming!

Cakespeare in the City: Episode 1 – Getting into the culinary groove

Walking the halls of the French Culinary Institute (FCI) in your first week as an official student, you definitely feel the aura of prestige and history that surrounds this place. For a 6 storey-building in the middle of Soho, it looks quite non-descript from the outside. But on the inside, it’s a totally different world. Walking up the stairs to the theatre for the first time was a little surreal. Mainly because it was my first time back in a learning environment for over 6 years but mostly because the stairs were lined with photographs of the most impressive chefs in America and it feels like they are looking at you with great expectations as you proceed up towards the theatre!

There were so many highlights this week I’m not quite sure where to start! And I’m only 1 day into the program.

So I’ve decided that I really needed to boil it down to my top 10 otherwise I’d be here for quite some time rather than outside enjoying the amazing city that is New York.

#1 Watching my first culinary basics demo by culinary legend Jacques Pepin. One of the great things about this school is the numerous demos that the faculty give – the Dean of Special Programs just so happens to be Jacques Pepin who is most famous for winning an Emmy with Julia Child (of Julie and Julia movie fame) and publishing a ton of culinary books.

Pepin covered a whole host of culinary basics from how to secure your wiping cloth to your apron strings properly to how to debone a chicken in about 10 minutes (don’t ask me how to do it though… it looked super hard and Pepin might as well be a magician!). One of the more interesting tips I picked up was that beating egg whites in a copper bowl has the same stabilising effect as adding a little vinegar.

Pepin showing his latest culinary textbook.

Packed theatre

#2 Finding out that my instructors are the c’est magnifique Chef Tai Chopping (who not only has the coolest name in the world but it’s also her real name) and super lovely and amazingly helpful Chef Judy Lai – both top notch cake and pastry stars in their own right. Chef Tai has worked in some of the most famous kitchens in New York and Chef Judy owns an incredibly successful cake business and has won tons of awards from a whole host of American bridal magazines. Didn’t get a pic of Chef Judy but I’ll post one up next week.

Chef Tai

#3 Bumping into Jacques Torres in the lift after family lunch on Day 1. If you haven’t heard of Jacques Torres before and you’re into your sweets then let me assist with getting you up to speed. All you need to know is that this man is a legend. He owns a chain of famous chocolate shops in New York but is probably more well known in the culinary world for being the youngest ever MOF or Meilleur Ouvrier Patissier de France (master pastry chef) which is a very difficult title to obtain as the competition is only run once every four years and some chefs have tried and failed to get it 3-4 times – thats over 16 years of training and is probably equivalent to the olympics for pastry chefs!

#4 Turning out my first genoise cake successfully and discovering the different types of buttercream that exist. French pate a bombe buttercream is pretty amazing stuff – made using a “whole egg foam” method it’s essentially egg yolks with a dash of egg white and cooked sugar syrup beaten with a ton of butter… not too sweet and has an amazingly velvety texture.

Genoise: a highly temperamental and deceptively simple looking cake. A couple of students’ genoises collapsed so I was relieved when mine turned out looking pretty ok!

I’m not a buttercream fan at the best of times but this pate a bombe-beurre was crazy good..

My two pillows of buttercream – all labelled and wrapped for Monday’s class

#5 Opening our amazing professional brand new toolkit. This felt like Christmas Day had arrived early! We’d been told that at orientation that it was “amazing” and “way cooler than the other programs’ kits” but this was beyond what I expected… Like seriously incredible. Any cake decorator knows just how much investment in equipment is required to achieve spectacular results – especially really good quality equipment. The stuff we got was top notch and probably the single most exciting part of our first day.

I’ll let the photos speak for themselves..(non-decorators feel free to scroll ahead…)

#6 Meeting my lovely classmates and realising one of them is Brazilian and her brother used to date one of my colleagues in sydney… this world is insanely small sometimes!!

Getting my first “Family Meal” – a daily occurrence at lunchtime where the culinary students prepare buffet style food for the whole of the FCI.

the lovely Martina and Ryan

Lily and I

Fabulous Marcia from Brazil

#7 The Bread Program. This is a great initiative where the excess bread baked by the Baking Program students is left on a shelf outside the Bread Kitchen and anyone at the FCI can take home as much as they want as long as they make a nominal donation to the Friends of the FCI which helps to fund needy students. Getting my first free loaf of delicious bread and a couple of croissants was definitely a highlight – especially when it saved me a trip to the supermarket that night!!

Shelves were a little empty by the time Marcia and I got there!

#8 Getting acquainted with the insanely awesome FCI library… ok so this one makes me sound like a ridiculous nerd but I could seriously sit in here for hours. Imagine every cook book or culinary book, food magazine or DVD all in one place and free to borrow! Even if you’re not a culinary student and just love food, this place is pretty amazing for the depth of resources available to get some fantastic inspiration.

A small part of the library – every cake decorating book ever published!

#9 Getting changed into my uniform for the first time and getting used to the “brigade” system of addressing the Chefs as “Yes Chef” “No Chef” – kinda like “Sir” or “Miss” in school except much weirder and more formal!! …. Changing into our whites for the first time was also a bit freaky and fabulously fun at the same time. We had no idea how to tie our neckties and I’m not the biggest fan of the beanie (mainly because I have a big head)but the uniform code is strict and spot inspections are made all the time to ensure everyone looks nice and presentable always. The more seasoned students that saw us newbies remarked that they could tell we were new because we still had the fold creases in our uniforms from beanie to apron!

And then last but not least…..

#10 Checking out NY Cake and Baking Supplies in Manhattan for the first time… this place is incredible! There was pretty much every decorating or baking item in one store and the best part was it’s only a few blocks from our apartment in Manhattan! I’ll try to get some pics of the inside next time..

Until next Episode, this little Cakespeare in the City is off to enjoy a night out on the town over Easter long weekend! Coming up next week… more baking action and hopefully a visit to the famed Carlo’s Bakery!

A monumental announcement…

This week I have a big announcement to unveil which I have been hinting at for quite some time! In very, very exciting news this little Cakespeare is taking a big bite out of the Big Apple!

That’s right dear readers, this little Cakespeare is going on the road for 3 months and travelling to New York to train at the French Culinary Institute!! I’ll be studying Master Pastry Chef Instructor Ron Ben-Israel’s expertly designed cake and pastry technique curriculum. In about 5 days, my journey of learning from a couple of the best cake artists and pastry chefs in New York and finally making my empire state of mind a reality begins!

Why New York?

I’ve been to New York quite a few times before but never longer than a week or two. A few years ago, I travelled there every two months on an amazing global project where I learned so much and grew immensely as a professional and as a person. It really did open my eyes to a city that never sleeps and an amazing energy that cannot be replicated in any other city in the world. So I suppose I could probably point to that project for really planting the seeds of the biggest cake adventure in my life but I must admit – the dream was always about New York first and the culinary school part came later in the piece when I realised it might actually be possible to live TWO dreams at once!

Walking the hallowed halls of this legendary culinary school which has produced superstars like David Chang of Momofuku, Wylie Dufresne of wd-50 molecular gastronomy fame and pastry greats like Jacques Pepin and Jacques Torres. To my Aussie readers this may not mean very much but if you’re from the US, you probably already know what an incredibleplace this is!!

As someone who hasn’t stopped working since they were 18 in a full time corporate job at the same firm, I figured this time is probably as good as any other to take stock of life and work out where I want to go. This wasn’t an easy decision to make and I consulted many of those closest to me.

This is where I need to acknowledge my very good pen friend and fellow cakie, Mandy, from the US who was one of the first students to do this course when it was initially developed. I cannot thank her enough for her invaluable advice about the course – her candid nature and complete honesty was what helped me to make this decision my eyes wide open and to set the expectations at the right level.

I have had my moments of total doubt and panic closely followed by moments of extreme excitement but I’ve realised I need to take the experience for what it should be: a whole lot of FUN. After working at the same place for 9 long years, I never imagined that it would be possible to actually make this a reality let alone be in a field so completely different to what I do every day. But here I am, planning for my move to New York this week and fretting about what to pack! My amazing Mr Cakespeare has been so amazingly awesome too – couldn’t really ask for a better husband 🙂

Many people have also asked why not Paris? Which I did ponder briefly given it is the home of the most amazing desserts and cakes in the world but I decided that New York is where my heart has always been (as much as the idea of rocking up to the Le Cordon Bleu in Paris was very, very tempting).  I did also seriously consider working in New York as a management consultant but the life of a management consultant in New York just didn’t seem to promise the same experience when the chances of you being outside Manhattan are about 99.9%!! After many horror stories of people who worked there and got burned out (or worse spent many long months commuting to remote locations in the US) I decided that that wasn’t the right answer.

What next?

This time next week I will be standing at the FCI at orientation: that is a daunting, daunting prospect in itself!! I can’t wait to share my stories with you from the concrete jungle where dreams are made of, so keep checking back cos this blog’s about to get a whole lot more exciting.

To whet your appetite, here’s an inspiring video of cake legend Ron Ben-Israel talking about the course:


What’s floristry got to do with it?

This week we take a slight departure from cakes and stuff made of sugar! I’ve always believed that no single field of expertise is one-dimensional when it comes to further development. Even in the world of management consulting where you have to develop a whole host of skills which aren’t just about great technical knowledge, powerpoint slides or effective client presentations — it’s also about the softer side of building relationships all the way through to the mundanity (is that a word? nope spellcheck just said it wasn’t, oh well, I’m making it one) of managing a job budgets and project economics.

The world of cake artistry is exactly the same. There aren’t a lot of jobs where you have to be about 6 professions at once and in the world of cakes you need to be a Baker, Sculptor, Artist, Engineer, Architect… and sometimes a Florist too!

So the importance of complementary skills is the mantra of this post today and I’m shining a spotlight on floristry.

Learning about the basics of floristry is essential in my book if you really want to understand how to arrange decorations properly (not just sugar flowers but aesthetics and placement of decorations in general). Even understanding how real flowers move and can be manipulated is really important to converting how you use flowers to the sugar realm. The business sensibility in me also cottoned on to the fact that knowing how to use real flowers on a cake is particularly important for brides on a budget and can’t afford ginormous numbers of sugar flowers. I also believe that having this skillset in the repertoire also helps to build a foundation for better sugar flower work too.

So I rocked up to a basic floristry class on a very rainy Saturday taught by the extremely lovely Bec of Fresh Flowers. They’re a Sydney based company who are just starting out but already making waves because of their cost effective beautiful arrangements. They even have their own flower farm which is rare for even the biggest florists in Sydney.

We covered some fundamentals in this day long workshop including basic wiring technique, making a buttonhole for weddings, creating simple centrepieces on a budget and creating a large beautiful bouquet using a simple layering method. Even the tricky wrapping of flowers with giant sheets of decorative paper was made simple.

My favourite part of the class by far was creating the buttonhole and bouquet. It was also great to get some hardcore wiring practice even though my thumbs were pretty raw afterwards. The best part? I managed to buy majorly professional florist secateurs for cutting through cake dowels like they’re sticks of butter – no more hurty hands! Woot woot!

My finished buttonhole

Materials for the buttonhole including cake dowel dominating secateurs

To summarise “Key Learnings” in true Management Consultant style:

  • Purchasing a “T” bar to make a button hole (far left in the picture above) is a really effective way to make a buttonhole safe and easy to create (essentially a small piece of plastic shaped like a capital T with a safety pin attached to the back). You can apparently get these from floristry shops – brides to be take note!
  • Trimming the base of your stems at a sharp angle is important to prevent suction to the base of a vase so that the flowers live longer.
  • Handy Tip Alert! For heavy water drinkers like gerberas (or any other flower with very thick stems for that matter) trimming 1 cm off the stem for every hour it has been out of water is important to prevent air pockets from forming within the stem of the gerbera which is what eventually makes them flop on their side! (such a cool and interesting learning for me by the way!!)
  • Making a simple grid at the top of your vase from clear sticky tape creates a stable base from which to arrange flowers so you don’t get that lopsided uneven floppy effect when someone brings you a bunch of flowers for a dinner party. Takes about 30 seconds but so worth the time!

Sticky tape grid in action!

  • Wiring allows for strength and movement. We wired gerberas by piercing the top of a 22 gauge wire into the centre of the gerbera first before wrapping in a spiral down the stem. This then allowed us to manipulate the gerbera any way we like – it’s a notoriously top heavy flower so the wires give it extra support. Note that there is a huge world of flower gauge wires out there – the gauge refers to the thickness of the wire and generally the lower the number, the thicker the wire. Here’s a floristry wire guide for those interested.
  • “The Sara Lee” method rocks. This pays homage to the famous Sara Lee layer cake whereby you layer flowers on their side in the same order you’d like to see them when upright — a very simple way to arrange very large bouquets (especially if you have small hands!). Walking around the table to see the bouquet from afar also helps to visualise the end product and rearrange as necessary. Here’s a photo of the layering method in action:


Interested in floristry classes?

Check out Fresh Flowers on facebook to find out more. They also do periodic Groupon type offers which are very good value. Faye Cahill also holds workshops with Kirsten Boike at her studio and I believe Kirsten also teaches the Sydney Community College which you can google easily for more info.

Moet and a Macaron Mythbusting Masterclass

A new month with new challenges! March has brought some really interesting new challenges – all of which seemed to start with the letter M!

Moet anyone?

I got a call from one of Mr Cakespeare’s bosses a few weeks back about a cake he wanted me to make for his wife. The brief? “Just a simple standing Moet & Chandon bottle with a box of chocolates that were actually made out of cake”…. Easy in concept, slightly trickier in execution!

I had to design the bottle for transportation and the boys both needed to transport the cake (Mr Cakespeare to work and his boss was taking the cake home).. Which meant 2 treacherous car trips and 2 very nervous men who were “not built to transport cakes”. So I decided in the end to make it a bottle lying down in a champagne box…

The box was originally designed to be a wooden box but I decided that was too boring and went instead for a pink gift box. We then decided to substitute the chocolates for chocolate cake pops wrapped in Lindt wrappers (Lindt was the birthday girl’s favourite chocolate) as a bit of a special extra something and gave it a more vintage girly feel which is very much Anna’s style.

Here’s the cake getting carved and shaped and the bottle rough ganached before hot knifing:

Carving the box with a 3cm rim was also a bit tricky and needed to be very precise because of the fragility of the structure. I managed to cover the whole top and rim in 1 piece of fondant and cut the edges freehand to make it look like a lid..

Believe it or not the part I actually struggled with the most was not the piping or the box or the bottle but what to put AROUND the bottle to make it look like the stuffing or straw you see in gift boxes… I made 3 different types of stuffing before I went for plain white to offset the pink and match the lace piping..

Now I have to confess that the box MAY have got slightly squashed at times because I was piping at around 1am at night…. and on occasion forgot about where I was resting my hand…. yikes. So the edges aren’t as beautifully straight as I would have liked.

The second hardest part was the label which would either make or break this design as it’s instantly recognisable and yet we also wanted to customise it with Anna’s birth year and a special message. I ended up designing it from scratch in powerpoint (yes in typical management consultant style) and then getting it custom printed by a cake decorating supplier. The message and writing were hand written which I’m pretty proud of!

Overall I thought it looked quite good… the humidity was a total killer and I think my airconditioning bill alone to keep the bottle from melting probably ate up whatever margin I may have made on this cake.

Macaron Mythbusting with Sensei JM

The next chapter of March was a fantastic macaron masterclass with Jean Michel Raynaud (also referred to as Sensei JM for his total mastery of all things sweet). Class was held on a sunny Sunday at Sydney’s Baroque Bistro and I rocked up with one of my best friend’s husband, Nav, who is a bit of a budding Zumbo (sorry JM I know you probably just shuddered reading that! :P). Being back in class with Sensei JM was great – mainly because he was in his usual hilarious form but also cos I got to hang out with my friend Michelle from Cake Craze in Newcastle again.

Class kicked off with intense theory and JM gave early warnings of potential moments of “blank faces” or “glassy eyes” because he likes to delve into technical stuff.  Personally this was the best part of the class for me!

Here are my top 5 Macaron Myths Busted from the masterclass!

Myth # 1 Busted: Drying time for Italian meringue macarons is necessary to achieve the perfect “foot”

Perhaps one of the biggest myths to JM dispelled for me was the “croutonage” concept which a lot of books say you need to do in order to form a “skin” on the macaron so it will rise in the oven to form the little foot at the bottom of the macaron. JM said this is a complete fallacy and proceeded proved to us was totally wrong in the class. For those who have read my previous “Macaron Madness” post, you’ll note that I too fell for this major myth!!

Note however drying the macarons after you pipe them isn’t COMPLETELY wrong. French macarons still require this time to dry because there is no cooked meringue mixture in the batter. However because of the cooked sugar used in the meringue for the Italian macarons, the longer you leave them to dry the more the sugar will crystallise and the quicker you lose the shine on the macarons. Major lightbulb moments happened for me when we covered this in our class.

Sensei JM puts the macarons immediately into this mammoth oven without drying and they still come out with perfect feet!


Myth # 2 Busted: Crystallisation in the pan is caused by not stirring the water and sugar together

“Water fiiirst people!” was JM’s mantra during the sugar syrup preparation process.

I once killed 3 batches of my sugar syrup with crystallisation. Each time I couldn’t work out why even though I googled the scientific basis behind crystallisation. Was it a dirty pan? Washed my pan and it happened again. Was it sugar on the side of my pan? Brushed down the sides with water and it still happened. Was it my thermometer? Cleaned it off and it STILL happened. This is by far my most feared downfall in macaron making.

Turns out all you need to do put the water in the pan first and NOT stir the sugar whilst it’s boiling. A simple trick is to also stir gently with your finger before putting to boil at a high heat. This is how you prevent the crazy growth of sugar crystals spreading like some unstoppable disease across your pan. Having a clean pan and brushing the sides down with water with your finger also helps. JM’s method hasn’t failed him for over 20 years so I think I’ll be doing this next time I make my macarons..


Myth # 3 Busted: Seized ganache cannot be saved

“Emulsion, emulsion, emulsion people…” When it comes to fillings ganache is by far the most popular in Australia. However there have been a number of times where I’ve thrown out seized ganache (where the chocolate and cream have separated). Now I’ve learned the way to rescue it! More water, less fat and then…. emulsion, emulsion, emulsion. To emulsify means to combine fat with water. It’s labour intensive but it’s also how most macaron fillings are made. Adding a little water and re-combining the ganache can help to save it… I’m definitely trying this next time!


Emulsion is also an important concept for achieving beautiful salted caramel which is what JM has become famous for. Lots of emulsion and a shedload of butter of course!!! Notice also how the colour of the caramel changes from quite a dark colour to a light brown colour with more emulsion. It’s a process that will definitely give you RSI but the taste is definitely worth it!!

Sensei JM adds the final touch of Fleur de Sel to the caramel after emulsion..

Myth # 4 Busted: Overworking the batter (macaronage) will cause the macarons to fail

The last major “aha!” moment was the process of working the batter and how to detect the right consistency. It’s a little hard to explain in words but essentially beating and mixing then folding until glossy is the way to go. The shinier your batter the more likely you’ll be to have shiny macarons. This is because the tant pour tant(TPT) mixture has been well combined and any lumps remaining will likely sink to the bottom. I had always avoided folding and beating the mixture too much because I was afraid of incorporating too much air but turns out that by mixing it a little more than I would have you get better results because you’re essentially breaking the albumin in the mixture down.

Here’s the progression of the macaron batter JM demonstrated:

TPT mixed with egg white and colour

Macaronage begins…until thick and glossy!


Myth #5 Busted: You have to watch your thermometer like a hawk to get to soft ball stage and overboiling kills the mixture

Not true! So this was the coolest part of the class. Watching JM dip his fingers in ice cold water then rapidly grabbing boiling sugar at well over 118C out of the pot to demonstrate what stage it was at. We observed all the stages of sugar from thread, soft ball, hard ball, soft crack and hard crack as JM dipped his fingers into the sugar over and over again playing with the little balls of sugar and throwing them onto the counter to demonstrate their consistency. Meanwhile I was freaking out wondering why his fingers weren’t burning!!!

Turns out that it really doesn’t matter what stage the sugar is at – you don’t need to watch the thermometer like a hawk until it reaches 118C (soft ball stage) – just adding ice water back into the sugar mixture will actually bring the temperature back down if you are under. So as long as you don’t pass into the “carbonised” (burned) stage your sugar syrup can always be saved! Hmmm… this could be a whole new area of interest for me….

Here’s Nav being the only soul brave enough to attempt the dipping of fingers in ice cold water then quickly grabbing sugar straight out of a very very hot pot of boiling sugar syrup (DO NOT TRY THIS AT HOME PLEASE!!)


The Verdict?

I highly recommend learning macarons with Sensei JM if you’ve never done it before – it saves you a whole lotta heartache and pain and you also take home a stack of macarons to enjoy and share with your family. And even if you have it’s still worth learning and observing all the tips and tricks that you can’t pick up through books or reading. They even give you your own apron and a funky little certificate to keep which was a nice touch!

Check out Baroque Bistro’s site for information and click here for more pics from the class that didn’t make the blog.

Stay tuned for some more March madness … some big developments in this little Cakespearare’s world are coming up soon!

Lace Piping & Sugar Flowers with Lorinda Seto

Lorinda Seto: a fantastic lady who is dedicated to the art of simply beautiful cakes. Definitely someone who has really redefined the term “self taught artist” and she is also a lovely, lovely person who exudes humility. Can’t say that about too many people these days can you! She’s also won a ton of prizes at the Sydney Royal Easter Show which shows that this lady has guts!!

I first met Lorinda a while ago when I was a cake newbie and took her Tiffany Cupcakes class with a friend (which still cause ripples amongst my likers and friends who go “ooh” and “ahh” when they see those cupcakes). We chatted after the class and reflected on her experiences as an ex-corporate lawyer and how she wound up in cake decorating and I felt like we had a pretty intrinsic connection just off the back of that alone! We have kept in contact since and she’s always been so helpful with tips and advice in moments of cake-stress (that’s my version of cake distress btw) that I decided it was time to dedicate a post to her workshops.

So I managed to make it to Lorinda’s Lace Piping class a few weeks ago.. hurrah!! And more recently I also begin learning the fine art of The Rose and The Gardenia from her at her Sugar Flowers workshop… double hurrah! I capitalise those flowers because each of those flowers could warrant their own posts. Incidentally and on a complete tangent, I also recently enquired about a class with Maggie Austin who is a renown cake artist from Washington DC and her next class was entitled (quite grandiosely) “The Rose” – capitalised you’ll note – to give it the eminence that it so rightly deserves.

So back to Lace Piping. There are also myriad upon myriad of styles of lace piping like you would not believe. I didn’t know this but if you can imagine this: any piece of lace – no matter what pattern or style – can be converted into a royal icing piped version.  That is like a whole miniature world of cake decoration right there! We learned 4 patterns during Lorinda’s workshop – all very intricately traced and transferred onto a lustred square dummy. This was the demo cake:

Lace Piping is such a detailed, back-breaking and patience-fuelled art form it’s hard to describe in words the type of person you need to be to achieve this type of piping. I’d probably pick masochist as the top word but Hardcore with a capital H would be the second. But level of difficulty and patience required aside, the world of cake decorators is usually split into two: those that love to pipe and those that are too scared to pipe. Then there are lace pipers. Don’t even get me started on those who love to do extension work and collars (far too complex to even get into here)… All I can say is google Eddie Spence and you’ll start to get the idea.

A piping workshop is also mostly very very quiet.. lots of hunched backs, tense jaws and sore hands. I don’t mind any of these factors at all. Maybe it’s because I’m a masochist when it comes to piping but it might be also because piping is a weird kind of escape from the everyday hustle and bustle and go, go, go pace that we are all so used to. I was so intensely focused for the 4 hours piping that I didn’t actually take many photos but here are some samples of what I managed to produce…My favourite is the flower at the bottom which is a really enjoyable technique called Brush Embroidery. I learned it for the first time at TAFE and it’s such a true art form because it relies so much on your paintbrush work and the consistency of your royal icing:

I’ve managed to already apply my skills onto a real cake order where I made a vintage look champagne bottle box which I’m really pleased about! Just goes to show how learning with Lorinda can be applied so quickly!

Another recent workshop I did with Lorinda was her Sugar Flower workshop. I love this photograph which really captures the essence of her classes – these three students were complete beginners and in just total awe of Lorinda’s skills, watching as she demonstrated how to make the petals of a small gardenia.

Lorinda explains how we should make the petals curl up to resemble real life gardenias:

Here’s the base of the gardenia assembled in an overlapped fashion:

Adding a second layer of petals:

My finished gardenia on an all-white cupcake:

The second flower we spent some time on was the classic rose – deceptively simple looking but really an art to perfect. Here’s Lorinda demonstrating the outer layers of the rose petals being added on:

My rose on a cupcake:

Overall, two great experiences and I highly recommend learning with Lorinda if you’re interested in highly approachable introductory techniques to cake decorating. Be warned that the Lace Piping one is for intermediates or the adventurous but it’s also quite rewarding. These classes don’t have huge wow factor with what you bring home but you will leave with the most transferable and scalable techniques applicable to many many designs which for me have been hugely beneficial. The trick is to adapt them to your own sense of style and aesthetic. Oh and Lorinda’s also lovely which helps 🙂

To find out more about Lorinda’s Workshops – check out Cakes by Lorinda on Facebook or email her at info@cakesbylorinda.com.au.

Glamour Finishes with Faye Cahill

First of all, apologies for how long this post has taken to get out of the oven!! Not many people outside the cake world really know this but Faye Cahill was one of the original founders of Planet Cake in Balmain and an extremely successful decorator who’s pioneered a number of stunning techniques in the Australian market, she is a bit of a demi-goddess to most cake decorators.

My last blog post was about the brilliant Jean Michel Raynaud and this one is about someone who also delivers stunning results on a daily basis and is Australia’s queen of vintage glamour when it comes to wedding cakes. The first workshop I actually took on Day 1 of the Perth Cake Convention was with Faye.

To me, she was a lovely gentle soul with a softspoken demeanour and is someone who just radiates “artist” vibes. Throughout the class she had this very nurturing way about her which made her a really great teacher. I first met Faye when I was going to commission a cake from her for my wedding and we had been emailing the week before about materials to bring to the course. I also wanted to attend one of her workshops on how to create sugar phalaenopsis orchids and couldn’t make it because of other commitments. Faye is based in Marrickville in Sydney so it was slightly ironic that I had to travel to Perth to learn from her.

The class was “Glamour Finishes” where we covered the quintessential basic Faye Cahill techniques that give her cakes the really polished finish that she’s become so famous for and makes her undoubtedly one of the most popular wedding cake designers in Sydney. It was a great refresher of the basics and an excellent warm up to a more challenging workshops ahead of me. Because of the abbreviated workshop format, Faye started off with a demo of how to ganache a round cake and also covered her tips of how to achieve a smooth shape. Nothing too new here for me but it was still useful to just compare Faye’s technique to others I have learned from.

We then moved on to covering our styrofoam dummy rounds with sugarpaste. Recapping the technique of how to create sharp edges was also useful with Faye coming around to show us how best to achieve sharp edges with our own equipment.

Next came the fun part – lustre! It was interesting to compare Faye’s technique with a very large bristle paintbrush with another that I’ve learned from Lorinda Seto. I found Faye’s creates a more vintage look and I actually created quite a “brushed” finish whereas Lorinda uses Chinese calligraphy brushes followed by sponging down the lustre before it dries to create a streak-free finish which is very polished.


Lustreing Faye’s way was actually really fun but we created a huge mess!! I had lustre specks all over my table by the time I was done with mine and didn’t actually get a photo of my lustred cake because my hands were totally covered in dried lustre! The other thing I noticed was any kind of tears or tiniest of cuts in the icing are instantly highlighted by lustre so it’s quite an art to get a perfectly lustred cake with absolutely no flaws.

The next part was the most fun – piping a simple dot pattern around the cake. This was a really great drill in the basics of small dots with a tiny tip on a pre-traced pattern. It was also so therapeutic having a hush fall over the room as everyone piped their dots intensely for a good 1/2 an hour.  

Piping to me is like a retreat into a state of total blankness of the mind.. It’s a bit like the cake decorator’s form of meditation! Nothing else enters your brain when you pipe. Some decorators describe it as “entering the zone” where you’re just completely focused and there’s nothing more gratifying than stepping away from a piped cake, no matter how simple design and being able to say “yeah.. i really like that!”. Here’s my finished piping!

The last part of the class was focused on making some simple ribbon roses. These are deceptively hard when you miss just 1 step!

Edit note: I have taken down the mini-tutorial on the ribbon rose so as not to compromise Faye’s teaching and classes but if you need more information on Faye’s classes please feel free to contact her directly at cakes@fayecahill.com.au

So overall, a really great class and an excellent way to practice and polish up on the fundamentals. Here’s the class with our finished cakes (unfortunately with Faye’s eyes closed!).


On a final note…Faye was a fantastic teacher despite some of the recent strain of the loss of one of her best decorators – Imogen White. Whilst I never got to meet Imogen, she clearly made a huge impact on the cake world and I just want to thank you Faye for getting through the class and still giving us a great experience. It was a pleasure learning with you and maybe one day I’ll be good enough to work for you! ; )

Finally, on a cheerier note, here’s a pic of me with Faye after the class! A better photo of my finished cake can be found here.

If you’d like to find out more about Faye’s classes check out her website here: http://www.fayecahill.com.au/

Madhatter Lalique Piping with Jean Michel Raynaud

Learning with Jean Michel Raynaud was probably my most rewarding workshop at the Perth Cake Convention. This was a four hour workshop which can only be described as insanity – insanely good experience and insanely character-building piping work. But more on that soon.

Firstly, a bit on Jean Michel. I would describe JM as a guy who really knows his stuff. You can tell how much pastry experience he has had because his depth of knowledge is evident even when explaining small things like saturation of icing with alcohol. You may have also eaten some of his macarons at Baroque Bistro & Patisserie which is in Sydney’s Rocks area. In fact, at one stage I think JM may have stolen the limelight from Adriano Zumbo’s infamous shops in Rozelle and Balmain because of the quality of his macarons. As a Frenchman now in Sydney, he has also been featured on Food Safari on the SBS in the French episode and was also an instrumental member of the Planet Cake team who built a record setting Opera House cake and re-created Wiliam and Catherine’s 8 tier Royal Wedding cake for Womens Weekly Australia in a mere 48 hours. You can find out more about JM at his facebook page here.

In terms of cake decorating, JM’s worked at Sweet Art and Planet Cake so his background speaks for itself. He favours a cake decorating aesthetic which he calls “organic”. I interpreted this to mean that whilst you still decorate in a very clean and polished way, it tends to look more “organic” when it is done in a less structured manner which could involve freehand piping, more visible brush strokes when applying colour (but in a deliberate manner) and generally a very natural type of finish. I think this style tends to suit more floral cakes or cakes which take their inspiration from nature. Some decorators, particularly those who are more minimalistic and favour more contemporary looks tend to do the exact opposite – solid colours, minimal designs, heavy use of geometric shapes, use of block colour etc which have been carefully traced onto a cake or conceived down to the millimetre.

Now back to the workshop and little old me…..

I wasn’t too sure what to expect from this workshop as we’d been given very sketchy details about what we’d learn (bit of feedback for the CAA team here!). But I signed up mainly because I was very interested in this technique called “lalique piping”. These were our materials for the class:

JM began with a demo of how to cover an asymmetrical tier and achieve sharp edges… nothing too new here for most people in the class but it was fun to watch JM at work. JM then showed us how to saturate and wash a pre-prepared madhatter shaped dummy cake with a pink airbrush colour mixed with decorating alcohol. The room smelled like a brewery after about 15min but we had fun practising how to achieve an “organic” look.


The design we were creating centred on piping the several trios of leaves of a lily flower on an asymmetrical madhatter cake. We weren’t given any guides or markings and were only shown the principles of how to pipe the right shapes. So for those that hadn’t piped much before there was a lot of apprehension and I daresay stress in the room!! JM also imparted the philosophy of creating “balance” on a cake and focused heavily on symmetry throughout the class, frequently giving us feedback on placement of our leaves and flowers so that we could achieve the intended effect.

We first piped the outlines of the flowers before creating extremely runny royal icing and flooding each leaf with water and icing.

Using a brush we then spread the icing around and just before it starts to set piped an extra “vein” down the centre of each leaf so it gave the impression of “melting” into the leaf. Here’s what it looks like when it’s still wet:


Piping on a bias on the side of a cake is super hard and I found it tough to connect everything evenly especially over the edge of a cake which is completely asymmetrical… the fatigue after 3 hours of piping also gets to you and lots of people in the class were complaining about how painful their hands were. I thankfully brought some chocolate and I also love piping so didn’t feel too bad… my apron was however covered in royal icing by the end of the class because of the number of mistakes I’d have to wipe off with my fingers clean on my apron…

We also got a chance to play with an airbrush at the end of class and sprayed some lustre onto the cake – so much fun!!! I’m already asking Mr Cakespeare if my next birthday present can be an airbrush gun.. teehee.

As the French say… et voila! Me with the master:

I then had to figure how on earth to take this cake home… some students from interstate had brought their own home made boxes. Luckily we all got a box to take home and I managed to get it home in one piece after using nearly a whole roll of sticky tape to secure the cake down.


Lalique piping is a really forgiving style and it gives you the freedom to make some mistakes so you can hide them later! Having said that, I really struggled with getting started. JM probably assisted just about every other student in their class to start their first leaf but me and I was happy that way as I believe the best way to learn is just to have the courage to dive right in and have a go. Even if that did mean I had to scrape mine off a few times before I got going…

Not amazing but given this was my first completely freehand piping attempt (no markers, no templates!) I’ve concluded that I really need to practice large swirls more but I’m really not too displeased with this final product!


Just want to finish up by saying thanks to Sensei JM – I know you weren’t too sure about being blogged about so hopefully I did you justice!

More workshop posts to come…

Encounters with the Cake Boss

Well dear readers it’s been a week-long recovery from a pretty huge caking weekend last week. The weekend of 5-6 February was the inaugural Everything Baking and Cake Convention which was a combination of local exhibitors showcasing their wares and a series of specialised workshops where you could learn from some of the most renown cake artists in Australia and from around the world.

My first reaction to the word “Convention” made me think of those Star Wars or Comic Book Conventions where a bunch of crazy loonies get together and indulge in a secret fantasy life or hobby that probably none of their friends or family really understand and usually just tolerate. I never thought that one day I’d be one of those people much less be blogging about the experience. Nor did I think it would be baking and cake-related.

This event was the first of its kind in Australia for so many reasons.

The biggest drawcard by far was the man at the centre of the infamous show, Cake Boss: Buddy Valastro.

The show airs on Lifestyle Food in Australia and The Lifestyle Channel (TLC) in the USA. It’s also shown in about 180 countries in the world and just started filming its 5th season. The following it has built is astonishing but if you stopped an average person on the street, chances are they may not have heard of this show. On the other hand, if you meet a fan they’ll generally say “Oh my god I love that show!” and are probably obsessed. Well imagine a few thousand “Oh my god I love that show” people gathered in one place on the other side of Australia and that was the atmosphere for about 2 days.

Day 1 of my trip was pretty amazing. I arrived the day before the Convention and actually kicked the trip off doing some real work (gasp) and made a presentation at work to our Perth team about a project I’m currently working which I spent the 5 hour flight preparing for. Presentation went great and it was my first time in Perth so I had this wide-eyed touristy look on my face even though I hadn’t even left my own country. I really was amazed at how green everything was and the laidback pace of the city.

I was staying at a hotel directly opposite the Convention Centre and in the cab on the way from work to the hotel I had one of those moments where my heart literally hit the floor. I had forgotten my tickets to the Cake Convention. “Amy, you idiot!” I hear you silently exclaiming.. yes, dear reader, in the crazy couple of days leading up to the trip, I managed to forget my tickets. So I’m in the cab trying to call the organisers and of course they’re not answering probably because they’re setting up for the convention the next day.

Pulling up to my hotel, I see a guy in a purple shirt with -lo and behold! a couple of the convention organisers pointing across to the convention centre (probably discussing his show the next day). Then I realised it was Mr Cake Boss himself. Mentally flipping out (outwardly very calm), I paid the cab driver and sauntered on over and said hello to the man. What must have been the first of about 1000 photo requests that weekend, he got one of his entourage people to take a photo of us on my phone and asked if I was going to show and where I’d come from. To which I replied I’d had a pretty early flight over from Sydney, feeling a bit jetlagged already and he said “You’re jetlagged?! how do you think I feel!” (the guy came from Hoboken New Jersey the day before).

Instead of capitalising on my 2 min conversation with Buddy and asking him for a job or something far more constructive, I was more focused on getting my ticketing issue sorted so to turned to the organisers and asked if they could help. They pointed me in the right direction but I did walk away thinking “hmm, probably could have used those 2 minutes a bit better. oh well”.

Now here’s where I need to thank Farrah who was one of the lovely event managers working for Cake Artists Australia – such a helpful lady who got me sorted in 5 minutes flat. We had a great chat about bringing the convention to the East Coast of Australia next year and I may try to help make this happen!!

Now contrary to popular belief, I had already bought my tickets to see Buddy Valastro live in Sydney before I heard about the convention so my primary reason for going all the way to the other side of the country was actually to learn from some amazing cake artists, not stalk Buddy Valastro.

To read more about my workshops, take a look at these links:

Madhatter Lalique Piping with Jean Michel Raynaud

Glamour Finishes with Faye Cahill

Baby Castle with Debbie Brown (coming soon)

For those of you who follow my Facebook page you would have seen that I also ended up on the flight back with Buddy Valastro.

So I’m minding my own business in the Virgin lounge, trying desperately to not fall asleep at what was the equivalent to 3am Sydney time before we boarded and Buddy rocks up again with his entourage of about 3 people. The funniest part is he went straight to buffet, didn’t see any food (it was 11:30pm) and walked straight back out to find a restaurant. I’d booked my flight home on Business so I could get some sleep before going back to work the next day (red eyes from Perth suck by the way) and the first thought I had was “oh crap there goes any sleep I was going to have”. As we boarded the plane, Buddy and crew rock up again! And we were literally the only 5 passengers in Business and boarded the plane first.There I was holding my two dummy cake boxes and a giant handbag and he’s all dressed up in a suit not looking like a working class baker at all.

I have to say they were a very noisy bunch, joking and laughing a lot for that time of night (it was midnight), and he did recognise me again (he must have a good memory for faces) and said “hey! we meet again!”. I think he was probably surprised that a lowly cake maker like me was boarding in Business. We chatted on the way to the plane and I may or may not have paid them out for talking so loudly (seriously if you didn’t know he was a famous TV personality you would have been like why are these people so loud!). This was one of those times I was secretly glad that I travelled so much for work as my Platinum status actually meant I was seated in front of Buddy. I never thought I would say this but the guy talked a lot. And Americans are LOUD. Sorry to my American friends reading this but maybe it’s just these Noo Joisey people. After eavesdropping on his conversation with Mauro (who btw is my FAVOURITE character/personality on Cake Boss) discussing the Superbowl, I finally plugged in my earphones to try and get some sleep… Landing in Sydney I decided I needed to try and get something to commemorate my plane trip with the Boss so he kindly signed my boarding pass and I charged off to meet my driver as I was already running late for work… a pretty fitting finale to a big caking weekend!

For my pics from his Sydney Cake Boss show at the Sydney Convention Centre, click the picture below.

So all in all, a pretty excellent trip. And my cakes got home safe and sound with only 1 broken flower on the madhatter and a slightly cracked tower on my baby castle cake to report… hoorah.

An invitation-inspired 1st Birthday Cake

Ok so I don’t know if this was trying to do too much… but 2 toppers, 12 cupcakes and a cutting tier in the same week my mum slipped at work, broke her wrist and got an operation as well as packing and preparing for a trip to Perth for was probably taking on just a little too much.

I made a resolution last year to keep things balanced and to only do 1 major project or “day out” each week so I wouldn’t overload myself. It’s only February and I’ve already broken this one in spades!!

Nevertheless, I still tried to make time to enjoy being in the moment while making this cake despite all the visits to the hospital to see mum and frantically running around like a madwoman getting supplies for my trip to Perth. I can describe this one as fun but tedious.. and I only really have myself to blame for the tedious part! This cake was for a friend who also happens to be my husband’s boss’s partner, Carolyn,…. so it had to be a good one. Carolyn wanted a 1st birthday cake for her gorgeous little girl, Grace, and the partygoers were the ladies in Carolyn’s mother’s group.

Carolyn is a pretty laidback lady and had no real restrictions on what she wanted in terms of design so this one was totally open to the imagination. I like to use things that mean something to the customer to design a cake and this case, so I asked what Grace’s favourite toy was. This cute little Snuggles Koala by Aussie company Britt was used as inspiration for a keepsake topper:

I also love using stationery as inspiration as the designs are often so interesting and easily translatable to cake designs. Little birthday girl Grace’s mum chose this “Castle Walls” invite from Tiny Prints.


So I sketched up this design and went all out with a top tier, cupcakes and a covered dummy tier to hold cake pops. In the end you can see that the design was adapted and scaled back to suit a 3 tier cake stand and I also added a touch more pink with the cupcake wrappers which were from Martha Stewart’s range.

The little castle topper which is colour matched to the invitation and a hand made number “1” is an extension of the bottom two thirds of the cake to give the cake a little more likeness to the original invitation castle and I also had to remove the base that the koala was sitting on to keep things a little more balanced on top of the cake.

Here’s a mini gallery that shows the evolution of the top tier – really simple but effective techniques of half covering a round and then individually pasting on each colour matched panel followed by applying polka dots cut out with a piping tube.


The cupcakes were fun but a little tedious. To achieve the polka dot effect I rolled lots of tiny coloured balls to create the polka dot effect on each cupcake. Strategically cutting the circles to get a variety of colours as well as placement of little balls of coloured sugarpaste were important steps in achieving this festive effect.


I have to thank my fantastic Mr Cakespeare (ie, my husband) in helping me to deliver this cake… he got it there in one piece whilst I was in Perth and was a total hero in the face of humidity, road bumps and a forgotten cake stand! “I was not built to transport cake” was his only response when I called him to ask him how it went…

On the bright side, the cake received 16 likes and about 10 comments after Carolyn posted it on her Facebook Wall ranging from “Not only did it look good but it tasted fantastic too!!!!!!” to “wow! amazing!” – all of which were just such a treat for me to read from the other side of the country 🙂

This was my last big order before I headed to the convention… coming up soon – a glamour finished cake with Faye Cahill, freehand “lalique” piping with Jean Michel Raynaud and a baby castle with Debbie Brown… stay tuned!!


Planet Cupcake and some Christmas Caking Cheer

I managed to do my bit for charity this month with a huge 2,000 cupcake making charity drive for the homeless at Planet Cake where I worked alongside numerous volunteers and talented artists like Anna Maria Roche (Right) and Naoko Irikura (Left) . That’s Planet Cake’s course director Lesley to the bottom right.


In between ganaching and decorating about 800+ cupcakes during my session, I got some wise words of cake business advice from brand-building genius (and now also a Logie nominee!) Paris Cutler.

* Please excuse my atrocious hair… bear in mind this was after a very long session of cupcaking!

The results

The last couple of little projects for 2011 were fun and quick little efforts to round out an pretty crazy month. This was a fruit cake with a winter theme and I used a method I read about online to create a Margie Carter designed Santa polar bear and penguin.

Christmas desserts at my Mum-in-Law’s (L-R):  Custard for pudding, Coconut jellies, Spanish Torron, Gingerbread Tree with Vanilla Cupcakes, Pineapple tarts (a childhood favourite!)

Click here for a better quality pic of the polar bear and penguin.

These Christmas Cupcakes were a fun little bunch that I made for a work christmas party and they went down a real treat!


Coming up next…

A fun Koala Bear and Castle polka dot birthday cake and one very very exciting Cake Convention. I’ll be learning from hugely talented cake artists including UK novelty and figurine extraordinaire Debbie Brown, Australian queen of wedding cakes and one of the original Planet Cake owners Faye Cahill, Jean Michel Raynaud of Baroque Bistro and … *drum roll*…. the Cake Boss himself: Buddy Valastro! Words cannot describe how excited I am to meet these guys!! Stay tuned for what promises to be an amazing month and some even bigger news coming soon….

Macaron Madness!!

The same friend who requested the camera cake also asked for 2 dozen macarons amongst a bunch of other requests for macarons plus I had to make a heap for the obligatory family Christmas gatherings. Making a normal batch of about 40 macaron shells is usually pretty challenging. But getting the results consistently for over 100 macaron shells is where the real fun begins and your sanity just about ends.

I could probably write tomes about macarons and others certainly have (a quick search on google will turn up hundreds of results and several blogs dedicated solely to the art of the perfect macaron). I’m self-taught when it comes to these fickle little delicacies of almondy delight and I have tried and tested about 4 different recipes. What I’ve realised is that there is no one foolproof method – it’s a matter of trial and error until you get the right recipe, bake time and drying time that fits the conditions in your own kitchen.

The two books I rely on the most are: Secrets of Macarons by Jose Marechal for a good recipe and I Love Macarons by Hisako Ogita for excellent interesting flavours. I have also tried Adrian Zumbo’s recipe however it asks for powdered egg whites which can be hard to come by and in my oven, it doesn’t seem to quite produce the same results.

Amy’s Top 4 Macaron Making Tips (I didn’t do a top 5 as I couldn’t think of a noteworthy 5th..)

Note that these are for the Italian meringue method, not the French method. I now only use the Italian method as I found my French macarons were too brittle and fragile for handling. The Italian method also gives you more reliable results and tastes a lot more moist and spongy when you bite into it. I’m not sure you can really see the difference but here are the two types:


French Macaron


Italian Macaron 

#1 Grind, Sift, Sift. Processing the icing sugar and almond meal together in a food processor can be time consuming and laborious but it’s absolutely essential. Sifting it twice through a fine sieve is even more so if you want nice smooth shells. This is my least favourite part of the recipe but a completely necessary evil. Doing large batches is especially heinous because it’s so laborious but I’ve never once compromised this part of the recipe.

# 2 Pipe everything and pipe the right amount. This is unavoidable if you covet a round shell that will rise evenly.  I use a 12 inch plastic piping bag and Loyal plastic 1cm piping tip. A handy trick is to stand the bag in a tall beer glass before you fill it so it doesn’t get too messy. The size of the piping relative to batter consistency also makes a difference. These are two experimental batches piped to different sizes using the same batter – look at how differently it rises.

The batch to the left were piped to 1 inch wide, the batch to the right were 3/4inch wide. 

Piping the filling is also necessary if you want a nice finish when you sandwich the shells together. I also use hand made baking paper cones to pipe the ganache / filling onto the shells. I was surprised at how much filling even a medium-sized shell requires to get the ganache all the way to the edge when you sandwich. In these photos, there is about 1 inch high mound of ganache for a standard 1.5 inch macaron:

Piped Chocolate Mint ganache filling and how much filling you need relative to shell size.


# 3 Croutonage is essential – for French Meringue macarons. This is also known as the drying time. And it really does vary depending on conditions. Some books say 10min, others say up to half an hour. Mine usually take 20-30min and if it takes longer, I usually know that I’ve messed up the proportions. The cardinal rule is if it leaves even the tiniest amount of residue when you touch one, it’s not ready. And don’t bung it in the oven thinking it’ll be fine… it generally won’t be and the 2 times I tried this both times the macaron didn’t rise evenly and the highly coveted little “feet” (also known as the crimpy part at the bottom of a perfect macaron which makes it a macaron as opposed to an almond biscuit or meringue) didn’t form. To top it all off they usually crack all over and end up looking more like cracked almond biscuits..

The perfect “feet” forming in the oven

# 4 Colouring the almond paste is more reliable than colouring the sugar syrup. I’ve tried adding colouring to the sugar syrup as is the method called for by Adriano Zumbo however this can be pretty risky depending on the colour. The main reason why I now avoid this method is because you can’t tell if your sugar is burning if your thermometer isn’t accurate. Usually by the time you smell it burning, that’ll be the time to chuck the sugar syrup out and face a hefty clean up of a sugar coated saucepan!! Also – if you are trying to achieve dark colours, use more colouring than you think you’d need.

To get to this shade of green and red…

…I needed about 1 bottle of Green & Red Spectrum brand gel paste food colouring which originally looked like this in almond paste form (note this varies by brand):

 Coloured almond paste

The funny thing is, people always wonder why macarons cost so much. If you’ve ever looked at a macaron recipe you can probably guess why. It’s an intensive process and so many things can go wrong at any point in time – not to mention almond meal is extremely expensive!!! So next time you think $2.50 for a macaron is hefty, have a go at making them in one colour and flavour then you’ll probably appreciate much more all the different flavours and work that goes into what seems like a high price.

Click here for my new facebook album dedicated to my macaron efforts!

Lights, camera cake… action!

I don’t think words can really adequately describe the fear I faced with this cake. There is nothing quite like the prospect of making a challenging cake you have never made before. Google is usually a bad place to start because you see some perfect creations and think “Mine is never gonna look that good!”. Then I reminded myself to have fun and that I was comparing myself to people who were sculptors or engineers by background and that I was neither of these. It took me a good 24 hours to muster up the courage to carve the body of this cake but I took the plunge late on a Tuesday evening after I’d got myself in the right mood over a couple of episodes of Modern Family. Keep in mind I was also baking 100 macaron shells the same week just in case you think I’m sounding a bit neurotic here..

The brief was a 70th cake for a friend’s father-in-law who is photography enthusiast and the only information I’d been given was that his name was Alan and he had a Nikon camera. So the process started with some good old fashioned googling to find out exactly what a Nikon cake looked like. Investing in my iPad was probably the best thing I’ve ever done – I had it in front of me nearly the whole time I was making this cake.

First step was the body. I did this in 3 layers and built up a small mound of cake on top where the flash would normally slot in. I also realised that using a filleting knife was a fantastic way to do the very fine carving required to get nice rounded edges. The lens was simple – a mini double barrel cake which I cut out using a large circle cutter in 4 layers. Ganaching was very easy except in the very deep parts of the handheld section of the body but because the carve was quite accurate, this didn’t take too long at all.

Here’s the cake in its ganached state before it got hot-knifed:

Then came the really really daunting part which I was fearing all along: covering the cake. Because I’d cut such deep recesses into the handheld part, I knew it was going to be tough to cover without tearing the sugarpaste. Worse still, it need to be clean because white cornflour stains on black icing are so hard to get rid of. It took 2 attempts but here is the first stage of covering the cake and the board:

Covering the lens was easy as it was the same process as normal round cake. Getting the textured part of the lens was also really simple – I just cut out a rectangular shape that would adequately wrap around the body of the lens and used a small quilting tool to mark out the borders. I then used the back of a very long knife to make the grid patterns by hand. In the absence of any embossing equipment, this was (I thought) a decent hand-crafted job!

Other details added including buttons, Nikon and the hallmark red V shape on all Nikon cameras:

I loved that this was really starting to come to life now. As you can see the white cornflour marks were not very pretty… so I ended up using my old piping gel trick to get rid of them:

And here’s where the amateur skill level starts to show a little… A bit of humidity again was my worse enemy with lumps and air bubbles forming around the handle. I also wanted to put a photograph of the birthday boy on edible rice paper to transfer onto the screen however the client never quite got there in sending me one!

So here it is in its finished form, I am pretty pleased with how it turned out and sure there were lots of things I would have liked to have fixed and changed but for my first complex novelty shape, I was pretty darn happy with the result!


For more pics of this cake, click here.

Behind the Scenes of December 2011 – Part I

Wow, I thought November was a big month but December 2011 proved to be even bigger! The first of a 2-part post kicks off with a couple of really fun cakes. I loved that these weren’t just pure novelty cakes but also allowed me to express some artistic freedom too.

Bows & Blossoms: the Corset Cake

First up: A corset cake. This was a really interesting brief as the person who asked for it gave me full artistic freedom in designing and creating this cake for a bridal shower – her only requirements were that it had to match a pink and black colour scheme. I actually didn’t know what a bridal shower was until I did this cake. For those who (like me) have no idea what a bridal shower is, this is the definition according to trusty Wikipedia: “The custom of the bridal shower is said to have grown out of earlier dowry practices, when a poor woman’s family might not have the money to provide a dowry for her, or when a father refused to give his daughter her dowry because he did not approve of the marriage. In such situations, friends of the woman would gather together and bring gifts that would compensate for the dowry and allow her to marry the man of her choice..”

Somehow I don’t think that the above rationale for a bridal shower still applies today. In my mind, it’s probably more of an excuse to have a bit of a party and get some bridal gifts before the real wedding! And Bridal Showers are not to be confused with a Hens either I’ve been told.

So back to the cake.. my only design constraints were that it had to look like a corset and be pink and black. Now I’ll confess that when I first got the order, I was a bit nervous about the structure. The first question that I was asking myself was: “Boobs or no boobs??”. A corset is quite a sexy piece of undergarment and all the pictures I’d seen online were 2D cakes with a couple of well-shaped mounds which can actually be quite hard to carve 3D.

In the end I settled for an hourglass shape that was a little more PG and little less R-rated. As with all my cakes, I sketched up a drawing for the client first.

The next part was baking 3 super high mud cakes which could be stacked to make a 9-10inch high hourglass shape. This is two of the 3 cakes stacked on top of each other to test the height:

I trimmed the tops off each of the baked cakes (which my husband always enjoys snacking on) and ganached the three layers together. Then came the hard part: carving. Most people don’t realise that 30-40% of the effort in creating a cake is actually in the early stages doing the carving and ganaching so that you lay the right foundations for the icing.

It took me around ½ an hour to carve this cake properly and I had to turn it constantly on a cake turntable to ensure it was as symmetrical as possible. The structure during carving is also quite unstable as there isn’t a lot of ganache holding the layers together. This is the cake after carving in all its symmetrical glory:

I then inserted a wooden dowel rod through all three layers of cake to give it some support and ganached the whole thing before putting it in the fridge to set.

   
Corset Cake setting in the fridge

Then came the hot-knifing process which I really love. This is where you get to smooth out all the little uneven parts and give the ganache nice polished finish before you apply the icing.


Final shape after ‘hot-knifing’ process

The most dreaded step for pretty much any cake I’ve ever made is putting on the sugarpaste icing. This is the most daunting and exhausting part because you have to make sure the icing is rolled out wide enough to cover the entire structure. If you’re even a few centimetres short you have may have to start the whole process again.  God forbid you think “stuff it, I’ll give it a go and see if I can make it” – bad, bad idea.

One of two things can happen: the icing tears or forms a dreaded ‘elephant skin’. Elephant skin is usually one of the most feared parts of cake decorating mainly because it is extremely hard to repair) or worse, you give up trying to repair, hate how it looks and can’t cover it with decoration and end up ripping it off to start over. This generally results in stained icing from the muddy ganache and what is by now a very frustrated decorator having to re-colour and re-knead a whole batch of icing. An exhausting process to say the very least.

This cake was very complex to cover because of the curves. It took me three attempts to cover this baby and I ended up having to do it in 2 sections. VERY hard. Ironically, much harder than a tall wedding cake tier because the curves have to be covered without any air bubbles forming under the icing and requires much more lifting and “fluffing” of the skirt of the icing to accommodate all the curves without air bubbles forming…

Anyway after much consternation, I finally got there and I’d also pre-made some sugar blossoms which I started arranging on the body of the corset to give an optical illusion of a skinnier waist:

To get the boning effect on the corset, I simply rolled out black sugarpaste with a fondant smoother, measured each length out and attached to the body with royal icing. I also piped black royal icing into the centre of each blossom to give them a stylised look.

Black icing is also very hard to work with as it gets stained really easily by cornflour and is hard to remove without leaving dusty white marks. This is where Piping Gel came in to save the day. I used piping gel to give the top and bottom of the corset some gloss and also get rid of any cornflour marks.

For more pictures of the the finished corset on my facebook page, click here.

The Chubby Buggy

Next order in queue was a ladybug cake for a very, very cute 3 year old called Hannah. I nicknamed it the chubby buggy cos it, well, looked like a chubby bug. Not surprisingly, the selected flavours were the ver popular chocolate mud and chocolate ganache. This was  30 person cake and the chosen colour theme instead of a traditional black and red scheme was pink and white which I personally loved as it was so much cuter.

This was a relatively simple cake to carve and ganache – 1 large hemisphere which I baked in a hemisphere tin and a smaller but very fudgey, gooey ball for the head which I used a cake pop recipe to give the cake a couple of different textures.  It also made rolling the head to a giant ball shape much much easier than baking two hemispheres.


Chubby Buggy in its half rough ganached form.
Chubby Buggy setting in the fridge.

Whilst easy to cover, the Chubby Buggy was actually time consuming in decoration as I decided that a plain old ladybug just would not do. Some of the finer details included piping a simple grass-like border around the ladybug body and sourcing the cutest pink toadstool candles which matched the colour scheme perfectly from a local party shop. I also made some miniature daisies and a pink and white spotted border.

This was probably my favourite cake of the month because of the birthday girl’s reaction when I delivered the cake. Totally priceless and I wish I could have bottled it for you to experience – the squeals of delight, little outstretched hands wanting to touch her colourful cake (much to my silent horror) and unstoppable wonder made all the hours of kneading, mixing, sticking, cutting, pressing and piping so worthwhile.  Feedback from her mum about the taste of the cake and the ‘thinness’ of the sugarpaste was also really rewarding.  It’s definitely a skill to not overload a cake with too much sugarpaste and 2-3mm is the holy grail of sugarpaste thickness so you dont wind up with a slice that’s just a mouthful of icing.  She is not a fan of sugarpaste at the best of times and I was delighted that she was so impressed by how thin the sugarpaste was on the cake. For full pics of the buggy on facebook and the birthday girl’s reactions, click here

Coming up next… Christmas, Camera Cake and Macaron Craziness!

The run up to Christmas was a challenging one with quite a few different macaron orders and …. *drum roll* ……a camera cake!! Yes you read that correctly. It’s was a toughie but a goodie!! I’ll write all about the Christmas caking frivolity in Part II of this post which I’ll post in the next couple of days.

Until then, Happy New Year to everyone who has taken the time out to read about this little Cake Venturist!! I know I’m a few days late but best wishes to all and your families and thank you to all my friends and family who have supported me to date, xoxo!

A month of cake venturing madness..

Phew what a month it’s been! I think November 2011 will go down as one of the biggest cake months in my personal Cake Venturing history..

It was also crazy because of the number of international visitors who were in Sydney this month. One of my best mates was in town from London, an ex-colleague was visiting from Amsterdam, old friends and colleagues were also in town for a mid-week wedding. To top it all off there’s been 4 birthdays in the family including my husband, my grandfather-in-law, my father-in-law and my brother.

So needless to say the month so far has been totally nuts and this Venture Cakerist is quite tired (even as I am typing this my eyes keep wanting to shut on me).

Those reading this who have tons of experience might think 4 cakes in 3 weeks is a walk in the park. But with a full time job, it’s been quite full on! Many late nights of work meant I’ve also started to develop a “He-Man”  right arm from the endless beating, stirring, kneading, rolling and ganaching work..

First on the list was a Star Wars Death Star birthday cake.  The cake was a caramel mud cake with dark chocolate ganache… yum. It was a birthday gift for my brother who is a big Star Wars fan. For those of you have no idea what this is, it’s Darth Vader’s spaceship in Star Wars…If you’re a Star Wars geek, don’t look too closely at the detail, you may get disappointed!!

This is how it started out in its perfectly shaped and ganached state:

What was supposed to be a very easy cake (aside from a spherical structure) turned out to be more complex than I thought. The baking, shaping and ganaching was all going very well… Then I had to manage my first “Cake Kryptonite” moment: humidity and heat.

After covering the cake with grey sugarpaste, the little concave part collapsed slightly because of the heat and you can see how the ganache started seeping through the bottom of the concave part…I had to do some emergency repair work and re-piping the day the cake was due to be delivered.

Hand painting each of the piped details with royal icing and silver lustre dust was also super time consuming. A couple of 2am nights and a bit of patchwork later this was the final cake:

The birthday boy’s reaction when he saw the cake:

If you’re wondering what the green thing is, it’s apparently some kind of ‘death ray’ but in my mind it was a useful way to hold up a side of the cake that was not liking the heat!!

Before cutting:
 
After devouring:

For my first spherical cake, I was pretty happy with the effort!!

The next cake for the month was a jungle/baby animal themed Baby Shower cake with 30 cupcakes for one of my closest girlfriends, Hayley. The process started with the animal toppers first which I made from coloured sugarpaste.

They were quite fiddly little things and again the heat ended up making the animals look a little pregnant… but I figured that was pretty appropriate for a baby shower anyway!

I made a last minute decision to create a dummy tier for the animals so that the mum-to-be could box it up as a keepsake. This is finished cutting tier and the assembled tower:

I ended up making a few carrot flavoured cupcakes for the Hayley’s Mum as she didn’t eat chocolate. These were decorated with some simple buttercream swirls and miniature sugarpaste roses.

My latest (and brightest!) cake for the month is a giant pair of “funky psychedelic” flip flops for a beach themed 60th birthday. This was requested by a friend from work for her mum Libby and the brief was “the brighter the better and if possible get the colours clashing!!” I couldn’t quite manage to make the colours clash and ended up making it actually look quite rainbow…

I ended up tinting 8 colours of sugarpaste for the stripes which was a big effort for someone who hates tinting sugarpaste!!

The flip flops with sides covered before the stripes went on.. Covering the carrot cake with white ganache was especially challenging in the heat and whilst you can’t tell in this picture, the inside of the left flip flop also melted and crumbled a little I ended up having to crumb coat the left one and do some major ganache reinforcement..

And voila.. The finished cake! The straps of the flip flops were held up with acetate strips – a neat little trick I picked up from the Planet Cake book.

Click here for a pic of the birthday girl’s reaction! I love seeing feedback like this – makes all the late nights caking so worthwhile and rewarding!!

In between all the cakes I managed to finally perfect my macarons. These are time consuming little things – on average 2 hours per batch because of the amount of processing of the almond/hazelnut meal and sifting required, not to mention the drying time (also known as croutonage) and huge amount of washing up afterwards. I made these for my husband’s grandfather as his birthday present and as a welcome home present for my best friend – glad to say i think they went down quite a treat!

Here’s a peek into my oven during baking:
Left to Right: Plain almond macarons, Hazelnut meal macarons (really yummy)

I’m so proud of those little feet on the macarons!! I actually did a little dance around my kitchen when they formed perfectly. Here are the finished “vintemporary” macarons:


All in all a month of some great baking and caking.

What I’ve realised is that flexibility in my job has been paramount to managing the caking madness. It’s been really challenging but so much fun at the same time. There really is nothing more therapeutic for me than creating a sugary delight…

And the fun’s not over yet..

I have one more cake planned for November – a Corset Cake for a bridal shower, should be really fun to make! With Christmas around the corner, I’m also looking forward to doing some really cool Christmas cakes so stay tuned!

As one chapter closes, another begins…

So I finished my final Cake Decorating class at TAFE last Saturday and boy has it been an epic couple of months! To sum up the experience in a sentence: tiring but rewarding, at times frustrating, other times manic but overall fantastic. Quite a few people have asked me to write about my experiences in the class so I thought I’d recount some of my cake ventures for you.

On Day 1, imagine my excitement when these were the first things I saw when I walked into class:

It was like the KitchenAid heavens had opened up and these gleaming machines had descended upon us…

After I introduced myself as a beginner cake decorator who was doing something totally different to her day job, the teacher of the class, Lynn, had me pegged as “the corporate girl”. I still remember her shouting out that I would never make any money and be able to leave my day job if I didn’t pipe my buttercream stars faster… Scary but true!!

This is Lynn doing her thing and the kitchen we worked in:

So to commemorate a 2 month long journey I thought I would try and represent my TAFE experience through some selected photos. Our first class was a teddy bear shaped vanilla sponge we baked from scratch and covered with buttercream icing (yum!):

Note the numerous baking paper piping bags in the background – Lynn drilled us on making these during Day 1 – I made nearly 20 in the first class! The first time I made these little bags it was like crazy origami and now I can do them in my sleep!! And they are a huge money saver.. a bit tougher to use than plastic piping bags but a great skill to have in times of piping need!

The first class is still the one I remember the most vividly even though it was over 2 months ago… it felt like I was in Masterchef, frantically mixing different colours of royal icing and madly piping buttercream stars onto my Teddy Bear cake for 1.5 hours working against the clock, frequently looking at my neighbouring students to check my progress and wondering how their stars were so much neater than mine!

This is the finished bear…(my brother says it looks like he’s having a smoke, I prefer to think of it as a purple tongue sticking out in a cheeky fashion as it was intended!)

I only ate 1 very small slice (mainly cos piping the buttercream was still giving me nightmares)

I also remember getting hugely frustrated with the first time I had to use No.1 piping tip. For those not in the know, a 1 tip is a piping tip size larger than the professional tips used for piping very very fine lines… One sugar crystal and your perfectly beautiful straight line of icing becomes a noodly mess and extremely frustrating to use. That’s when you find out if you were born to pipe or not. The diligent pipers will get their little cocktail stick, scrape away the sugar crystal and keep persevering… The less diligent ones will either a) give up or b) throw the whole thing out and try to start again. I’m glad to say don’t do either and I still love to pipe.

A couple of classes later we covered Brush Embroidery… a really beautiful technique for creating fantastic vintage looks.. One of my favourite classes cos it was truly a artistic experience with no real time pressure and total freedom to create something from our imaginations. This is the piece I started in class:

In one of our later classes we learned how to use pastillage which is a really hard drying form of sugar intended to build 3D structures you’re not meant to be able to eat (well you could .. but it would crack your teeth). It dries super fast to a texture similar to fine china and is basically impossible to work with unless you are extremely prepared and have all your templates ready. We used this to build simple chocolate gift boxes during class:

The pieces were a bit of a rush job but hey, for my first pastillage attempt I wasn’t too displeased with them! We were also only mean to make 2 heart shaped boxes but I got adventurous and decided to try and assemble my own rectangular box without any templates…. living life on the cake edge!!!

Anyway, in our final class we learned how to do some basic sugar flowers and covering fruit cakes with marzipan and sugarpaste. I was really bummed that I missed out of most of the sugar flower component cos I had to leave early to get to a wedding… in the end I only managed to get some basic frangipanis done and cover this cake which in itself was a trial as the sugarpaste was so soft from the humidity it was a total nightmare to work with:

Before…
…After!

I’m saving this fruit cake for Christmas to eat with the family and I’m still working on a second fruit cake from final class which I’ll cover with the frangipanis so I’ll post that up next time I update this blog. I’m thinking the theme will be “winter wonderland”… so stay tuned!

So in the space of about 9 weeks I think it’s fair to say I learned a lot. Scary Lynn also taught me a huge deal about the commercial realities of the cake decorating business.  For instance, wastage of the slightest scrap of material is considered a total sin – or as she put it “throwing money in the bin”. So I’ve learned to be very efficient about weighing my materials and being as precise as possible about estimating quantities. The downside is I also have about 10 tubs of different leftover coloured royal icing in the fridge which I feel too guilty to throw out and am slowly working my way through when I practice my piping!

All in all, I’ve progressed from being the corporate girl who pipes slowly to “absolutely fearless”(I think this was in reference to me always wandering off-syllabus and trying to do my own thing!). So I’m pretty pleased with how I went and I’ve got a great bunch of new skills which I’m already applying.

So look out cake world, Amy’s Cakes is TAFE qualified and venturing on…!!

Let’s start at the very beginning..

After much persuasion from family and friends who are much more experienced than I am in the art of le bloggage, I’ve decided to start my own blog about my “life after five” which over the last few months has revolved pretty squarely around 3 things:

1. Cake
2. Sugar
3. Covering cakes with sugar

It amazed me how much support I’ve received in the last few weeks from friends, family and mentors to start up my very own facebook page. I’ve even managed to get a few paid jobs to practice an amazing craft (and start recouping the many dollars spent on cake decorating equipment and storage!).

So here is my very own little space on the world wide scary web where I plan to diarise my cake adventures properly in written prose rather than random facebook status updates and selective photos on my facebook profile. Hurray for all you (un)lucky readers out there!

So who am I and why exactly am I writing about my after 5 hobby?

I joined the corporate world when I left high school and have never really looked back since. Being creative is something I love but tend to de-prioritise because it’s really not very lucrative if you’re not any good. Outside of piano practice growing up, academics, work, sport and getting my degree were my main priorities. Throw a close knit Chinese family and a loving boyfriend (now husband) to the mix and you can imagine why I really never had much time for anything else. Today, I’m a qualified accountant and a management consultant and I still love what I do – being a Consultant is about as creative as the corporate world gets and there are aspects I still enjoy. However it brings a totally different type of fulfilment to my life than CAKE does.

Why Cake???

I’ve always loved being “artsy fartsy” but never really gave myself much time or freedom to indulge (and yes I use the word indulge) in something as “fanciful” as cake decoration.

I still remember my very first (very bad) attempt** at trying to decorate a giant “R” shaped cake for one of my closest friends when I was still at uni…a total chocolatey piped ugliness .. looking back now I can’t believe I thought it was the best cake I’d ever done! Probably because at the time it was..(I really didn’t have a benchmark to compare it to in total management consultant speak). BUT the real “icing on the cake” was that it tasted god awful (I had accidentally substituted peanut oil for vegetable oil! Ew!). Here it is in all its amateur wonder:

** atrocious photography included free of charge

Then came the second major attempt when I thought I was on a roll…. I actually used maltose to make the sugar ribbons – so wrongtown!!! The chocolate teddy bears were a decent attempt in chocolate moulding though, I’ll give myself that 🙂

That was back in 2008 and it was intended to be a tiffany box. This was definitely a case of a concept not being executed in real life – it ended up being a very hard ganached chocolate box with tiffany coloured ribbon. Oops. And yes gross too – the ribbon melted in the Sydney summer heat a few hours later and was a big goopy mess.

So 3 years, 2 workshops and 1 nearly finished TAFE course later … here I am bumbling away on my self-taught journey of sugary goodness! After my first proper cake class I managed to produce this little monkey… and then it all began!

In the past few months, I’ve discovered sugarpaste, modelling paste, gumpaste – more pastes than you can poke a stick at really.

And even more new terms like pastillage, brush embroidery, tylose, silpat, acetate… it’s like a whole new language and I’m not sure a dictionary would cover all the words in a cake artist’s vocabulary. There’s a technique to this crart which can only be mastered with practice and those who love it, love it with a huge passion. In fact, I’ve never met a dispassionate cake decorator and I’m pretty sure I never will!

Many of my friends have suggested starting a proper business.. but somehow a big part of me still cannot let go of the security of a pretty great corporate career so far. Never mind the constant waves of self-doubt when I see the bajillions of other amazing cakes out there in an increasingly competitive market. I think I’m still working out my point of differentiation as I develop my own style and continue to practice the techniques I’ve learned.

But hey – there is one thing I am good at when it comes to cakes, I am “totally fearless” according to my TAFE teacher – and I’ll try anything once! The best thing about sugar is you can eat your mistakes, so no boundaries or limits – ever!!

So maybe give it a few months and let’s see where this Venture Cakerist called Amy goes. In the mean time, I hope you enjoy the ride and thanks for getting this far in my first post!